[toc]
centos7.8搭建openstack Mitaka版
mitaka版密码说明
| 密码名称 | 描述 |
|---|---|
| 数据库密码(不能使用变量) | 数据库的root密码 |
ADMIN_PASS | admin 用户密码 |
CEILOMETER_DBPASS | Telemetry 服务的数据库密码 |
CEILOMETER_PASS | Telemetry 服务的 ceilometer 用户密码 |
CINDER_DBPASS | 块设备存储服务的数据库密码 |
CINDER_PASS | 块设备存储服务的 cinder 密码 |
DASH_DBPASS | Database password for the dashboard |
DEMO_PASS | demo 用户的密码 |
GLANCE_DBPASS | 镜像服务的数据库密码 |
GLANCE_PASS | 镜像服务的 glance 用户密码 |
HEAT_DBPASS | Orchestration服务的数据库密码 |
HEAT_DOMAIN_PASS | Orchestration 域的密码 |
HEAT_PASS | Orchestration 服务中heat用户的密码 |
KEYSTONE_DBPASS | 认证服务的数据库密码 |
NEUTRON_DBPASS | 网络服务的数据库密码 |
NEUTRON_PASS | 网络服务的 neutron 用户密码 |
NOVA_DBPASS | 计算服务的数据库密码 |
NOVA_PASS | 计算服务中nova用户的密码 |
RABBIT_PASS | RabbitMQ的guest用户密码 |
SWIFT_PASS | 对象存储服务用户swift的密码 |
实验环境
| 角色 | IP | 主机名 | 默认网关 | 硬件环境 | 虚拟化 | 防火墙 | selinux |
|---|---|---|---|---|---|---|---|
| 控制节点 | 10.0.0.11/24 | controller | 10.0.0.1 | 4G内存,50G硬盘 | 开启 | 关闭 | 关闭 |
| 计算节点 | 10.0.0.31/24 | compute1 | 10.0.0.1 | 4G内存,50G硬盘 | 开启 | 关闭 | 关闭 |
1.基础环境配置
1.1 关闭防火墙和selinux
//禁用防火墙
systemctl stop firewalld && systemctl disable firewalld

//禁用selinux
#临时修改
setenforce 0

#永久修改,重启服务器后生效
sed -i '7s/enforcing/disabled/' /etc/selinux/config
1.2 配置hosts解析
#控制节点和计算节点相同操作
cat >> /etc/hosts << EOF
10.0.0.11 controller
10.0.0.31 compute1
10.0.0.41 block1
10.0.0.51 object1
10.0.0.52 object2
EOF
1.3 配置NTP服务,要保证控制节点和计算节点时间一致
控制节点
1.安装chrony
yum -y install chrony

2.编辑chrony配置文件/etc/chrony.conf
    /删除以下4行,使用阿里云NTP服务器
    server 0.centos.pool.ntp.org iburst
    server 1.centos.pool.ntp.org iburst
    server 2.centos.pool.ntp.org iburst
    server 3.centos.pool.ntp.org iburst
    修改为
    server ntp1.aliyun.com iburst
   /允许连接控制节点的网段,24行增加以下一行
    allow 10.0.0.0/24

#用以下命令修改
sed -i '3,6d' /etc/chrony.conf && sed -i '3cserver ntp1.aliyun.com iburst' \
/etc/chrony.conf && sed -i '23callow 10.0.0.0/24' /etc/chrony.conf

3.启动NTP服务并设置开机自启
systemctl enable chronyd && systemctl start chronyd

4.检查端口,监听udp323端口
netstat -nupl|grep chronyd
udp        0      0 127.0.0.1:323           0.0.0.0:*              29356/chronyd
udp        0      0 0.0.0.0:123             0.0.0.0:*              29356/chronyd
udp6       0      0 ::1:323                 :::*                   29356/chronyd

5.验证
chronyc sources
210 Number of sources = 1
MS Name/IP address         Stratum Poll Reach LastRx Last sample
===============================================================================
^* 8.8.8.8                 2   6    37    29    +43us[ -830us] +/-   22ms
计算节点
1.安装chrony
yum -y install chrony

2.编辑chrony配置文件/etc/chrony.conf
    /删除以下4行,指定控制节点为NTP服务器
    server 0.centos.pool.ntp.org iburst
    server 1.centos.pool.ntp.org iburst
    server 2.centos.pool.ntp.org iburst
    server 3.centos.pool.ntp.org iburst
    修改为
    server controller iburst

#用以下命令修改
sed -i '3,6d' /etc/chrony.conf && sed -i '3cserver controller iburst' /etc/chrony.conf

3.启动NTP服务并设置开机自启
systemctl enable chronyd && systemctl start chronyd

4.检查端口,监听udp323端口
netstat -nupl|grep chronyd
udp        0      0 127.0.0.1:323       0.0.0.0:*         1327/chronyd
udp6       0      0 ::1:323             :::*              1327/chronyd

5.验证,计算节点显示的是控制节点
chronyc sources
210 Number of sources = 1
MS Name/IP address         Stratum Poll Reach LastRx Last sample
===============================================================================
^? controller                    3   6   200    50  +1319ms[+1319ms] +/-  14.4s
1.4 下载openstack官方yum源安装openstack客户端
⚠️Mitaka版官方文档中直接安装centos-release-openstack-mitaka会提示没有可用包(使用的是阿里云的yum源),得先下载一个包才可以继续安装!!!
下载官方yum源提示无包可用解决方法
控制节点和计算节点相同操作
#下载yum源并安装openstack客户端
wget https://cbs.centos.org/kojifiles/packages/centos-release-openstack-mitaka/1/1.el7/noarch/centos-release-openstack-mitaka-1-1.el7.noarch.rpm
yum -y localinstall centos-release-openstack-mitaka-1-1.el7.noarch.rpm
yum -y install python-openstackclient
到此,控制节点和计算节点操作完成!!!
2.控制节点环境安装
2.1 安装mariadb数据库
1.安装mariadb数据库
yum -y install mariadb mariadb-server python2-PyMySQL

2.创建并编辑 /etc/my.cnf.d/openstack.cnf
在[mysqld]中,设置“bind-address”值为控制节点的管理网络IP地址以使得其他节点可以通过管理网络访问访问数据库。设置其他关键字来设置一些有用的选项和UTF-8编码
cat > /etc/my.cnf.d/openstack.cnf << EOF
[mysqld]
bind-address = 10.0.0.11
default-storage-engine = innodb
innodb_file_per_table = on
max_connections = 4096
collation-server = utf8_general_ci
character-set-server = utf8
EOF

3.启动数据库并设置开机自启
systemctl enable mariadb && systemctl start mariadb

4.进行数据库安全设置
mysql_secure_installation

Enter current password for root (enter for none):		/没有密码,直接回车
Set root password? [Y/n] n							            /不设置root密码
Remove anonymous users? [Y/n] y					            /移除匿名用户
Disallow root login remotely? [Y/n] y					      /禁止root远程登陆
Remove test database and access to it? [Y/n] y		  /移除test数据库
Reload privilege tables now? [Y/n] y					      /刷新权限表
2.2 安装MongoDB数据库
Telemetry 服务使用 NoSQL 数据库来存储信息,典型地,这个数据库运行在控制节点上。向导中使用MongoDB。
mongodb监听tcp/27017
1.安装MongoDB数据库
yum -y install mongodb-server mongodb

2.编辑文件/etc/mongod.conf
配置 bind_ip 使用控制节点管理网卡的IP地址
修改第6行为
bind_ip = 10.0.0.11

默认情况下,MongoDB会在``/var/lib/mongodb/journal`` 目录下创建几个1GB大小的日志文件。如果你想将每个日志文件大小减小到128MB并且限制日志文件占用的总空间为512MB,配置 smallfiles 的值
取消第113行注释
smallfiles = true

#用以下命令修改
sed -i.bak '/^bind_ip/cbind_ip = 10.0.0.11' /etc/mongod.conf \
&& sed -i 's/#smallfiles = true/smallfiles = true/' /etc/mongod.conf

3.启动MongoDB并设置为开机自启
systemctl enable mongod && systemctl start mongod
2.3 安装消息队列rabbitmq
OpenStack 使用 message queue 协调操作和各服务的状态信息。消息队列服务一般运行在控制节点上
rabbitmq会启动2个端口
tcp/5672 rabbitmq服务端口
tcp/25672 多个rabbitmq通信用到的端口
1.安装rabbitmq
yum -y install rabbitmq-server

2.启动消息队列rabbitmq并设置为开机自启
systemctl enable rabbitmq-server && systemctl start rabbitmq-server

3.添加openstack用户
rabbitmqctl add_user openstack RABBIT_PASS

Creating user "openstack"


4.给openstack用户设置读和写权限   3个.*分别是 可读、可写、可配置
rabbitmqctl set_permissions openstack ".*" ".*" ".*"

Setting permissions for user "openstack" in vhost "/"


5.启动rabbitmq一个插件,启动之后会监听tcp/15672,是一个web管理界面,默认用户名密码guest
rabbitmq-plugins enable rabbitmq_management

The following plugins have been enabled:
  amqp_client
  cowlib
  cowboy
  rabbitmq_web_dispatch
  rabbitmq_management_agent
  rabbitmq_management

Applying plugin configuration to rabbit@controller... started 6 plugins.
2.4 安装memcached
认证服务认证缓存使用Memcached缓存令牌。缓存服务memecached运行在控制节点。在生产部署中,我们推荐联合启用防火墙、认证和加密保证它的安全。
memcache监听 tcp/udp 11211端口
1.安装软件包
yum -y install memcached python-memcached

2.修改配置文件,设置memcache监听端口为控制节点,默认监听127.0.0.1
sed -i.bak 's#127.0.0.1#10.0.0.11#g' /etc/sysconfig/memcached

3.启动memcached并设置为开机自启
systemctl enable memcached && systemctl start memcached
到此,控制节点环境安装完成!!!
3.控制节点认证服务keystone安装
keystone认证服务功能:认证管理、授权管理、服务目录
认证:用户名和密码
授权:授权管理,例如一些技术网站(掘金、csdn)可以授权微信、QQ登陆
服务目录:相当于通讯录,即要访问openstack的镜像、网络、存储等服务,只需要找到keystone即可,而不需要再单独记住各个服务的访问地址
- 后续每安装一个服务都需要在keystone上注册
3.1 创建keystone数据库并授权
#用以下命令操作
mysql -e "CREATE DATABASE keystone;"
mysql -e "GRANT ALL PRIVILEGES ON keystone.* TO 'keystone'@'localhost' \
IDENTIFIED BY 'KEYSTONE_DBPASS';"
mysql -e "GRANT ALL PRIVILEGES ON keystone.* TO 'keystone'@'%' \
IDENTIFIED BY 'KEYSTONE_DBPASS';"
3.2 配置keystron
3.2.1 安装和配置keystron
-
keystone借助apache访问
-
mod_wsgi是帮助apache连接python程序
-
监听端口 5000(普通用户访问) 35357(管理员用户访问),apache做了2个多端口的站点
1.安装相关包
yum -y install openstack-keystone httpd mod_wsgi openstack-utils.noarch

2.编辑文件 /etc/keystone/keystone.conf 并完成如下动作:
在 [database] 部分,配置数据库访问:
[root@controller ~]# vim /etc/keystone/keystone.conf
[database]
connection = mysql+pymysql://keystone:KEYSTONE_DBPASS@controller/keystone
在[token]部分,配置Fernet UUID令牌的提供者
[token]
provider = fernet

#用以下命令修改
\cp /etc/keystone/keystone.conf{,.bak}
grep -Ev '^$|#' /etc/keystone/keystone.conf.bak >/etc/keystone/keystone.conf
openstack-config --set /etc/keystone/keystone.conf DEFAULT admin_token  ADMIN_TOKEN
openstack-config --set /etc/keystone/keystone.conf database connection  mysql+pymysql://keystone:KEYSTONE_DBPASS@controller/keystone
openstack-config --set /etc/keystone/keystone.conf token provider  fernet

MD5值
md5sum /etc/keystone/keystone.conf
d5acb3db852fe3f247f4f872b051b7a9  /etc/keystone/keystone.conf


3.初始化身份认证服务的数据库(切换到keystone用户,使用的shell是/bin/sh,执行 -c后的命令)
su -s /bin/sh -c "keystone-manage db_sync" keystone

上一步操作为导入表,以下命令执行返回有表即为正确
mysql keystone -e "show tables;"|wc -l
38

4.初始化Fernet key
keystone-manage fernet_setup --keystone-user keystone \
--keystone-group keystone

5.配置Apache服务器
5.1编辑/etc/httpd/conf/httpd.conf`文件,配置``ServerName`` 选项为控制节点
96行下入以下一行
ServerName controller

#用以下命令修改
sed -i.bak '96cServerName controller' /etc/httpd/conf/httpd.conf

MD5值
md5sum /etc/httpd/conf/httpd.conf
eaf0e2ae3fea84bac3e5a842f64bdfdb  /etc/httpd/conf/httpd.conf


5.2创建文件/etc/httpd/conf.d/wsgi-keystone.conf
cat > /etc/httpd/conf.d/wsgi-keystone.conf <<\EOF
Listen 5000
Listen 35357

<VirtualHost *:5000>
    WSGIDaemonProcess keystone-public processes=5 threads=1 user=keystone group=keystone display-name=%{GROUP}
    WSGIProcessGroup keystone-public
    WSGIScriptAlias / /usr/bin/keystone-wsgi-public
    WSGIApplicationGroup %{GLOBAL}
    WSGIPassAuthorization On
    ErrorLogFormat "%{cu}t %M"
    ErrorLog /var/log/httpd/keystone-error.log
    CustomLog /var/log/httpd/keystone-access.log combined

    <Directory /usr/bin>
        Require all granted
    </Directory>
</VirtualHost>

<VirtualHost *:35357>
    WSGIDaemonProcess keystone-admin processes=5 threads=1 user=keystone group=keystone display-name=%{GROUP}
    WSGIProcessGroup keystone-admin
    WSGIScriptAlias / /usr/bin/keystone-wsgi-admin
    WSGIApplicationGroup %{GLOBAL}
    WSGIPassAuthorization On
    ErrorLogFormat "%{cu}t %M"
    ErrorLog /var/log/httpd/keystone-error.log
    CustomLog /var/log/httpd/keystone-access.log combined

    <Directory /usr/bin>
        Require all granted
    </Directory>
</VirtualHost>
EOF

MD5值
md5sum /etc/httpd/conf.d/wsgi-keystone.conf
8f051eb53577f67356ed03e4550315c2  /etc/httpd/conf.d/wsgi-keystone.conf


6.启动apache并设置为开机自启
systemctl enable httpd && systemctl start httpd
3.2.2 创建服务实体和API端点
API端点有3个
- public 公共
- internal 内部
- admin 管理员
1.先决条件
#配置身份验证令牌
export OS_TOKEN=ADMIN_TOKEN
#配置端点URL
export OS_URL=http://controller:35357/v3
#配置Identity API版本
export OS_IDENTITY_API_VERSION=3

2.创建服务实体和API端点
2.1 Identity服务管理OpenStack环境中的服务目录。服务使用此目录来确定您的环境中可用的其他服务。
为Identity服务创建服务实体
openstack service create --name \
keystone --description "OpenStack Identity" identity
+-------------+----------------------------------+
| Field       | Value                            |
+-------------+----------------------------------+
| description | OpenStack Identity               |
| enabled     | True                             |
| id          | c7c0d1e96d7e4f809c2957099eb8a0d2 |
| name        | keystone                         |
| type        | identity                         |
+-------------+----------------------------------+

2.2 Identity服务管理与OpenStack环境中的服务关联的API端点的目录。服务使用此目录来确定如何与环境中的其他服务进行通信。
OpenStack为每项服务使用三种API端点变体:admin,internal和public。管理API端点允许默认修改用户和租户,而公共和内部API不允许这些操作。在生产环境中,出于安全原因,变体可能驻留在为不同类型的用户提供服务的单独网络上。例如,公共API网络可能从Internet上可见,因此客户可以管理他们的云。管理API网络可能仅限于管理云基础架构的组织内的运营商。内部API网络可能仅限于包含OpenStack服务的主机。此外,OpenStack支持多个区域以实现可伸缩性。为简单起见,本指南将管理网络用于所有端点变体和默认值 RegionOne地区。
创建Identity Service API端点:

#公共普通用户使用5000端口
openstack endpoint create --region RegionOne \
identity public http://controller:5000/v3
+--------------+----------------------------------+
| Field        | Value                            |
+--------------+----------------------------------+
| enabled      | True                             |
| id           | f63e9c4450254214947ac75cddd394c1 |
| interface    | public                           |
| region       | RegionOne                        |
| region_id    | RegionOne                        |
| service_id   | c7c0d1e96d7e4f809c2957099eb8a0d2 |
| service_name | keystone                         |
| service_type | identity                         |
| url          | http://controller:5000/v3        |
+--------------+----------------------------------+

#keystone内部通信使用5000端口
openstack endpoint create --region RegionOne \
identity internal http://controller:5000/v3
+--------------+----------------------------------+
| Field        | Value                            |
+--------------+----------------------------------+
| enabled      | True                             |
| id           | 9b6a5be720ea46a4a38f403c47ad8b8f |
| interface    | internal                         |
| region       | RegionOne                        |
| region_id    | RegionOne                        |
| service_id   | c7c0d1e96d7e4f809c2957099eb8a0d2 |
| service_name | keystone                         |
| service_type | identity                         |
| url          | http://controller:5000/v3        |
+--------------+----------------------------------+

#管理员使用35357端口
openstack endpoint create --region RegionOne \
identity admin http://controller:35357/v3
+--------------+----------------------------------+
| Field        | Value                            |
+--------------+----------------------------------+
| enabled      | True                             |
| id           | 53d4bdc5bea041a0abfb9ea89dff65d6 |
| interface    | admin                            |
| region       | RegionOne                        |
| region_id    | RegionOne                        |
| service_id   | c7c0d1e96d7e4f809c2957099eb8a0d2 |
| service_name | keystone                         |
| service_type | identity                         |
| url          | http://controller:35357/v3       |
+--------------+----------------------------------+
创建完API端点后使用命令openstack endpoint list验证是否创建成功
openstack endpoint list
+----------------------------------+-----------+--------------+--------------+---------+-----------+----------------------------+
| ID                               | Region    | Service Name | Service Type | Enabled | Interface | URL                        |
+----------------------------------+-----------+--------------+--------------+---------+-----------+----------------------------+
| 2f551bb367c045379a8042cdcb7287eb | RegionOne | keystone     | identity     | True    | public    | http://controller:5000/v3  |
| 77b014a9b8d44d038cb5d608ff6b9d56 | RegionOne | keystone     | identity     | True    | internal  | http://controller:5000/v3  |
| c2fcc9c1ee0244acb2860124a1575fd0 | RegionOne | keystone     | identity     | True    | admin     | http://controller:35357/v3 |
+----------------------------------+-----------+--------------+--------------+---------+-----------+----------------------------+
删除API端点使用openstack delete <endpoint-id>
3.3 创建域、项目、用户和角色
3.3.1 创建默认域
openstack domain create --description "Default Domain" default
+-------------+----------------------------------+
| Field       | Value                            |
+-------------+----------------------------------+
| description | Default Domain                   |
| enabled     | True                             |
| id          | fad8700e172044e6ac4869c9eed6d2c3 |
| name        | default                          |
+-------------+----------------------------------+
3.3.2 为环境中的管理操作创建管理项目,用户和角色
1.创建管理项目
openstack project create --domain default \
--description "Admin Project" admin
+-------------+----------------------------------+
| Field       | Value                            |
+-------------+----------------------------------+
| description | Admin Project                    |
| domain_id   | fad8700e172044e6ac4869c9eed6d2c3 |
| enabled     | True                             |
| id          | 9c1b0cb2b3914507b429f3f7b0c6b5e4 |
| is_domain   | False                            |
| name        | admin                            |
| parent_id   | fad8700e172044e6ac4869c9eed6d2c3 |
+-------------+----------------------------------+

2.创建管理员用户,密码设置为ADMIN_PASS     //这里交互式创建密码和非交互式选择其中一种
#非交互式设置密码
openstack user create --domain default \
--password ADMIN_PASS admin
+-----------+----------------------------------+
| Field     | Value                            |
+-----------+----------------------------------+
| domain_id | 984cb3d5f3054e16b029676de97b6ca6 |
| enabled   | True                             |
| id        | 273c94d5f389418b83ee6738376a6bdf |
| name      | admin                            |
+-----------+----------------------------------+

#交互式设置密码
openstack user create --domain default \
--password-prompt admin
User Password:
Repeat User Password:
+-----------+----------------------------------+
| Field     | Value                            |
+-----------+----------------------------------+
| domain_id | fad8700e172044e6ac4869c9eed6d2c3 |
| enabled   | True                             |
| id        | cc0f0af9f5c1492aa8919bf936c1c19b |
| name      | admin                            |
+-----------+----------------------------------+

3.创建管理员角色
openstack role create admin
+-----------+----------------------------------+
| Field     | Value                            |
+-----------+----------------------------------+
| domain_id | None                             |
| id        | 921e36b9338141479f52f7c46c04f9ef |
| name      | admin                            |
+-----------+----------------------------------+

4.将admin角色添加到admin项目和用户
openstack role add --project admin --user admin admin
3.3.3 本指南使用的服务项目包含您添加到环境中的每项服务的唯一用户
创建服务项目
#service,后期用于关联openstack系统用户glance、nova、neutron
openstack project create --domain default \
--description "Service Project" service
+-------------+----------------------------------+
| Field       | Value                            |
+-------------+----------------------------------+
| description | Service Project                  |
| domain_id   | fad8700e172044e6ac4869c9eed6d2c3 |
| enabled     | True                             |
| id          | ae31639e04be474cbabcad502be62cac |
| is_domain   | False                            |
| name        | service                          |
| parent_id   | fad8700e172044e6ac4869c9eed6d2c3 |
+-------------+----------------------------------+
3.3.4 常规(非管理员)任务应该使用非特权项目和用户。例如,本指南创建了演示项目和用户
1.创建演示项目
openstack project create --domain default \
--description "Demo Project" demo
+-------------+----------------------------------+
| Field       | Value                            |
+-------------+----------------------------------+
| description | Demo Project                     |
| domain_id   | fad8700e172044e6ac4869c9eed6d2c3 |
| enabled     | True                             |
| id          | 6244aa0291104859b255990cef3eacd6 |
| is_domain   | False                            |
| name        | demo                             |
| parent_id   | fad8700e172044e6ac4869c9eed6d2c3 |
+-------------+----------------------------------+

2.创建演示用户,密码设置为123456   //这里交互式创建密码和非交互式选择其中一种
#非交互式创建密码
openstack user create --domain default \
--password 123456 demo
+-----------+----------------------------------+
| Field     | Value                            |
+-----------+----------------------------------+
| domain_id | af51b1180eb14a66b0380e4cd134df90 |
| enabled   | True                             |
| id        | c75ad14657d0497190cb479ba50f531b |
| name      | demo                             |
+-----------+----------------------------------+

#交互式创建密码
openstack user create --domain default \
--password-prompt demo
User Password:
Repeat User Password:
+-----------+----------------------------------+
| Field     | Value                            |
+-----------+----------------------------------+
| domain_id | fad8700e172044e6ac4869c9eed6d2c3 |
| enabled   | True                             |
| id        | 4639e42215a946b4be7e588d36979c64 |
| name      | demo                             |
+-----------+----------------------------------+

3.创建用户角色
openstack role create user
+-----------+----------------------------------+
| Field     | Value                            |
+-----------+----------------------------------+
| domain_id | None                             |
| id        | a35f989b04d1403e92a19895cae21c9d |
| name      | user                             |
+-----------+----------------------------------+

4.将用户角色添加到演示项目和用户
openstack role add --project demo --user demo user
3.4 验证操作
3.4.1 出于安全原因,请禁用临时身份验证令牌机制:
编辑文件 /etc/keystone/keystone-paste.ini 并且移除admin_token_auth 从 [pipeline:public_api], [pipeline:admin_api], 和 [pipeline:api_v3] 部分
这一步操作可能会造成后续keystone认证失败!!!,实验的时候可以不执行!!!
sed -i.bak '51,64d' /etc/keystone/keystone-paste.ini
3.4.2 取消设置临时OS_TOKEN和OS_URL环境变量
unset OS_TOKEN OS_URL
3.4.3 作为admin用户,请求身份验证令牌,密码为ADMIN_PASS
openstack --os-auth-url http://controller:35357/v3 \
--os-project-domain-name default --os-user-domain-name default  \
--os-project-name admin --os-username admin token issue
Password:
+------------+----------------------------------------------------------------------------------------------------------------------------------------------+
| Field      | Value                                                                                                                                        |
+------------+----------------------------------------------------------------------------------------------------------------------------------------------+
| expires    | 2019-01-31T05:46:45.000000Z                                                                                                                  |
| id         | gAAAAABcUn21ftl6WYlhMsqIffRDo9Pg6Ei35hUlg8D_kzw1Azy-                                                                                         |
|            | 4Ly1DeL0s3YbMOlz88jVFWnMyg2gaxFoVsS2pZYnRhVlnclg1yofFFHOENz39XHsuCUYICuDq4XqOLEbKWyS9IfZuNbWtKjEQa-jQaoe4PCk0fyFG0B6nE3vn9gNkOvXiTA          |
| project_id | 9c1b0cb2b3914507b429f3f7b0c6b5e4                                                                                                             |
| user_id    | cc0f0af9f5c1492aa8919bf936c1c19b                                                                                                             |
+------------+----------------------------------------------------------------------------------------------------------------------------------------------+
3.4.4 作为演示用户,请求身份验证令牌
执行3.4.1就会有问题,会报错HTTP 500
openstack --os-auth-url http://controller:5000/v3 \
--os-project-domain-name default --os-user-domain-name default \
--os-project-name demo --os-username demo token issue
Password:
Discovering versions from the identity service failed when creating the password plugin. Attempting to determine version from URL.
Internal Server Error (HTTP 500)
不执行3.4.1,验证就没有问题
openstack --os-auth-url http://controller:5000/v3 \
--os-project-domain-name default --os-user-domain-name default \
--os-project-name demo --os-username demo token issue
+------------+-----------------------------------------------------------------------------------------------------------------------------------------+
| Field      | Value                                                                                                                                   |
+------------+-----------------------------------------------------------------------------------------------------------------------------------------+
| expires    | 2019-01-31T10:30:43.000000Z                                                                                                             |
| id         | gAAAAABeym2jDfXll4iZ2JcCP1XY1mHbu8Ovgaf8BMWe1FsoBp9XkaEqsnphx_BIuY0RFC-goS-JVZJ0xbiOajLnob7nWYKz5zlPlGkybvtDWd6L3jRMGD20RE-             |
|            | H5gRz5oBXPPRUt9e5Kxbc-5_WXu_nfjw3ASXPIu25inoeeXsvd1aeg9FzgBE                                                                            |
| project_id | d08b00aa3c6944afa7095c280319acb9                                                                                                        |
| user_id    | ec75d657d09c4899894d40364011f552                                                                                                        |
+------------+-----------------------------------------------------------------------------------------------------------------------------------------+
3.5 创建OpenStack客户端环境脚本
3.5.1 创建脚本
编辑admin-openrc文件并添加以下内容,这里放在/opt下
cat > /opt/admin-openrc <<EOF
export OS_PROJECT_DOMAIN_NAME=default
export OS_USER_DOMAIN_NAME=default
export OS_PROJECT_NAME=admin
export OS_USERNAME=admin
export OS_PASSWORD=ADMIN_PASS
export OS_AUTH_URL=http://controller:35357/v3
export OS_IDENTITY_API_VERSION=3
export OS_IMAGE_API_VERSION=2
EOF
3.5.2 使用脚本
1.加载admin-openrc文件,使用Identity服务的位置以及admin项目和用户凭据填充环境变量
source /opt/admin-openrc

2.请求身份验证令牌(注意expires中是UTC时间,落后中国8个小时,我国是东八区,使用timedatectl查看时间及时区,默认过期时间1小时)
openstack token issue
+------------+----------------------------------------------------------------------------------------------------------------------------------------------+
| Field      | Value                                                                                                                                        |
+------------+----------------------------------------------------------------------------------------------------------------------------------------------+
| expires    | 2019-01-31T10:49:41.000000Z                                                                                                                  |
| id         | gAAAAABcUsS1O_B3QETf0hx8KWiuUyTBz23e2E70mY6DeWPvZreQrX58bEyJcMVgLGazsrKrqaJw0gSK75JHT0WNHf7V6VxNR5-uYLJKsGIuaUzNe9RMdTys_CcK680L-            |
|            | NU9VdSDllR6GQvbu4EqejSm_1d5iarR2cQD8n8kG1PcV_SNijApskk                                                                                       |
| project_id | e33e3feaef784a5bb45bd9c766bc0f46                                                                                                             |
| user_id    | aaa8bfce5b5d451b956bb76dee235b9e                                                                                                             |
+------------+----------------------------------------------------------------------------------------------------------------------------------------------+
到此,控制节点认证服务keystone安装完成!!!
4.控制节点镜像服务glance安装
OpenStack镜像服务包括以下组件:
glance-api 接收镜像API的调用,诸如镜像发现、恢复、存储
glance-registry 存储、处理和恢复镜像的元数据(属性),元数据包括项诸如大小和类型
glance服务监听两个端口
glance-api 9292
glance-registry 9191
4.1 创建glance数据库并授权
#用以下命令修改
mysql -e "CREATE DATABASE glance;"
mysql -e "GRANT ALL PRIVILEGES ON glance.* TO 'glance'@'localhost' \
IDENTIFIED BY 'GLANCE_DBPASS';"
mysql -e "GRANT ALL PRIVILEGES ON glance.* TO 'glance'@'%' \
IDENTIFIED BY 'GLANCE_DBPASS';"
4.2 获取管理员凭据以获取对仅管理员CLI命令的访问
source /opt/admin-openrc
4.3 创建服务凭据
4.3.1 创建glance用户,密码设置为GLANCE_PASS
//这里交互式创建密码和非交互式选择其中一种
#非交互式设置密码
openstack user create --domain default --password GLANCE_PASS glance
+-----------+----------------------------------+
| Field     | Value                            |
+-----------+----------------------------------+
| domain_id | af51b1180eb14a66b0380e4cd134df90 |
| enabled   | True                             |
| id        | 593894e4dabc411ebecf8cbe8f3f1109 |
| name      | glance                           |
+-----------+----------------------------------+

#交互式设置密码
openstack user create --domain default --password-prompt glance
User Password:
Repeat User Password:
+-----------+----------------------------------+
| Field     | Value                            |
+-----------+----------------------------------+
| domain_id | b245194b1e8749d0b3c51a78e05d7734 |
| enabled   | True                             |
| id        | ff135a9cce5e4a55842dd2beaffa67e2 |
| name      | glance                           |
+-----------+----------------------------------+
4.3.2 将管理角色添加到glance用户和服务项目中
openstack role add --project service --user glance admin
4.3.3 创建glance服务实体
openstack service create --name glance \
--description "OpenStack Image" image
+-------------+----------------------------------+
| Field       | Value                            |
+-------------+----------------------------------+
| description | OpenStack Image                  |
| enabled     | True                             |
| id          | de2e6d60f6234918a96f768516a36e9a |
| name        | glance                           |
| type        | image                            |
+-------------+----------------------------------+
删除服务实体使用命令openstack service delete <service-id>
使用命令openstack service list查看service-id然后根据id删除
4.3.4 创建Image服务API端点
openstack endpoint create --region RegionOne \
image public http://controller:9292
+--------------+----------------------------------+
| Field        | Value                            |
+--------------+----------------------------------+
| enabled      | True                             |
| id           | 7aede44313aa4f98971c513fb6aa37b9 |
| interface    | public                           |
| region       | RegionOne                        |
| region_id    | RegionOne                        |
| service_id   | de2e6d60f6234918a96f768516a36e9a |
| service_name | glance                           |
| service_type | image                            |
| url          | http://controller:9292           |
+--------------+----------------------------------+

openstack endpoint create --region RegionOne \
image internal http://controller:9292
+--------------+----------------------------------+
| Field        | Value                            |
+--------------+----------------------------------+
| enabled      | True                             |
| id           | 8edf9fd9452347d99d1a419b5f631f2c |
| interface    | internal                         |
| region       | RegionOne                        |
| region_id    | RegionOne                        |
| service_id   | de2e6d60f6234918a96f768516a36e9a |
| service_name | glance                           |
| service_type | image                            |
| url          | http://controller:9292           |
+--------------+----------------------------------+

openstack endpoint create --region RegionOne \
image admin http://controller:9292
+--------------+----------------------------------+
| Field        | Value                            |
+--------------+----------------------------------+
| enabled      | True                             |
| id           | 89ced10fcf444d5a95c9ad5fd9381040 |
| interface    | admin                            |
| region       | RegionOne                        |
| region_id    | RegionOne                        |
| service_id   | de2e6d60f6234918a96f768516a36e9a |
| service_name | glance                           |
| service_type | image                            |
| url          | http://controller:9292           |
+--------------+----------------------------------+
删除API端点使用命令openstack endpoint delete <endpoint-id>
使用命令openstack endpoint list查看endpoint-id然后根据id删除
4.4 安装和配��置组件
4.4.1 安装包
yum -y install openstack-glance
4.4.2 编辑/etc/glance/glance-api.conf文件并完成以下操作
1.在[database]部分中,配置数据库访问
[database]
...
connection = mysql+pymysql://glance:GLANCE_DBPASS@controller/glance

2.在[keystone_authtoken]和[paste_deploy]部分中,配置身份服务访问
[keystone_authtoken]
...
auth_uri = http://controller:5000
auth_url = http://controller:35357
memcached_servers = controller:11211
auth_type = password
project_domain_name = default
user_domain_name = default
project_name = service
username = glance
password = GLANCE_PASS

[paste_deploy]
...
flavor = keystone


3.在[glance_store]部分中,配置本地文件系统存储和映像文件的位置
[glance_store]
...
stores = file,http
default_store = file
filesystem_store_datadir = /var/lib/glance/images/

#用以下命令修改
\cp /etc/glance/glance-api.conf{,.bak}
grep '^[a-Z\[]' /etc/glance/glance-api.conf.bak >/etc/glance/glance-api.conf
openstack-config --set /etc/glance/glance-api.conf  database  connection  mysql+pymysql://glance:GLANCE_DBPASS@controller/glance
openstack-config --set /etc/glance/glance-api.conf  glance_store stores  file,http
openstack-config --set /etc/glance/glance-api.conf  glance_store default_store  file
openstack-config --set /etc/glance/glance-api.conf  glance_store filesystem_store_datadir  /var/lib/glance/images/
openstack-config --set /etc/glance/glance-api.conf  keystone_authtoken auth_uri  http://controller:5000
openstack-config --set /etc/glance/glance-api.conf  keystone_authtoken auth_url  http://controller:35357
openstack-config --set /etc/glance/glance-api.conf  keystone_authtoken memcached_servers  controller:11211
openstack-config --set /etc/glance/glance-api.conf  keystone_authtoken auth_type  password
openstack-config --set /etc/glance/glance-api.conf  keystone_authtoken project_domain_name  default
openstack-config --set /etc/glance/glance-api.conf  keystone_authtoken user_domain_name  default
openstack-config --set /etc/glance/glance-api.conf  keystone_authtoken project_name  service
openstack-config --set /etc/glance/glance-api.conf  keystone_authtoken username  glance
openstack-config --set /etc/glance/glance-api.conf  keystone_authtoken password  GLANCE_PASS
openstack-config --set /etc/glance/glance-api.conf  paste_deploy flavor  keystone

MD5值
md5sum /etc/glance/glance-api.conf
3e1a4234c133eda11b413788e001cba3  /etc/glance/glance-api.conf
4.4.3 编辑/etc/glance/glance-registry.conf文件并完成以下操作
1.在[database]部分中,配置数据库访问:
[database]
...
connection = mysql+pymysql://glance:GLANCE_DBPASS@controller/glance

2.在[keystone_authtoken]和[paste_deploy]部分中,配置身份服务访问:
...
auth_uri = http://controller:5000
auth_url = http://controller:35357
memcached_servers = controller:11211
auth_type = password
project_domain_name = default
user_domain_name = default
project_name = service
username = glance
password = GLANCE_PASS

[paste_deploy]
...
flavor = keystone

#用以下命令修改
\cp /etc/glance/glance-registry.conf{,.bak}
grep '^[a-Z\[]' /etc/glance/glance-registry.conf.bak > /etc/glance/glance-registry.conf
openstack-config --set /etc/glance/glance-registry.conf  database  connection  mysql+pymysql://glance:GLANCE_DBPASS@controller/glance
openstack-config --set /etc/glance/glance-registry.conf  keystone_authtoken auth_uri  http://controller:5000
openstack-config --set /etc/glance/glance-registry.conf  keystone_authtoken auth_url  http://controller:35357
openstack-config --set /etc/glance/glance-registry.conf  keystone_authtoken memcached_servers  controller:11211
openstack-config --set /etc/glance/glance-registry.conf  keystone_authtoken auth_type  password
openstack-config --set /etc/glance/glance-registry.conf  keystone_authtoken project_domain_name  default
openstack-config --set /etc/glance/glance-registry.conf  keystone_authtoken user_domain_name  default
openstack-config --set /etc/glance/glance-registry.conf  keystone_authtoken project_name  service
openstack-config --set /etc/glance/glance-registry.conf  keystone_authtoken username  glance
openstack-config --set /etc/glance/glance-registry.conf  keystone_authtoken password  GLANCE_PASS
openstack-config --set /etc/glance/glance-registry.conf  paste_deploy flavor  keystone

MD5值
md5sum /etc/glance/glance-registry.conf
46acabd81a65b924256f56fe34d90b8f  /etc/glance/glance-registry.conf
4.4.4 同步数据库
忽略此输出中的任何弃用消息
su -s /bin/sh -c "glance-manage db_sync" glance

Option "verbose" from group "DEFAULT" is deprecated for removal.  Its value may be silently ignored in the future.
/usr/lib/python2.7/site-packages/oslo_db/sqlalchemy/enginefacade.py:1056: OsloDBDeprecationWarning: EngineFacade is deprecated; please use oslo_db.sqlalchemy.enginefacade
  expire_on_commit=expire_on_commit, _conf=conf)
/usr/lib/python2.7/site-packages/pymysql/cursors.py:170: Warning: (1831, u'Duplicate index `ix_image_properties_image_id_name`. This is deprecated and will be disallowed in a future release.')
  result = self._query(query)

#有输出即为正确
mysql glance -e "show tables;" | wc -l
21
4.4.5 启动glance服务并设置为开机自启(glance-api和glance-registry)
systemctl enable openstack-glance-api openstack-glance-registry && \
systemctl start openstack-glance-api openstack-glance-registry
4.4.6 验证操作
1.获取管理员凭据以获取对仅管理员CLI命令的访问权限
source /opt/admin-openrc

2.下载源镜像
wget http://download.cirros-cloud.net/0.3.4/cirros-0.3.4-x86_64-disk.img

3.使用QCOW2磁盘格式,裸容器格式和公共可见性将映像上载到映像服务 ,以便所有项目都可以访问它
注意:这一步一定要看执行后输出结果中size大小,如果为0则说明镜像上载有问题
openstack image create "cirros" \
--file cirros-0.3.4-x86_64-disk.img \
--disk-format qcow2 --container-format bare \
--public
+------------------+------------------------------------------------------+
| Field            | Value                                                |
+------------------+------------------------------------------------------+
| checksum         | ee1eca47dc88f4879d8a229cc70a07c6                     |
| container_format | bare                                                 |
| created_at       | 2019-01-31T12:26:32Z                                 |
| disk_format      | qcow2                                                |
| file             | /v2/images/ac21b17b-e910-4ca4-b743-914b8fbd0e55/file |
| id               | ac21b17b-e910-4ca4-b743-914b8fbd0e55                 |
| min_disk         | 0                                                    |
| min_ram          | 0                                                    |
| name             | cirros                                               |
| owner            | e33e3feaef784a5bb45bd9c766bc0f46                     |
| protected        | False                                                |
| schema           | /v2/schemas/image                                    |
| size             | 13287936                                             | //一定要注意这里的大小,为0有错误
| status           | active                                               |
| tags             |                                                      |
| updated_at       | 2019-01-31T12:26:34Z                                 |
| virtual_size     | None                                                 |
| visibility       | public                                               |
+------------------+------------------------------------------------------+


镜像上传位置
[root@controller images]# pwd
/var/lib/glance/images
[root@controller images]# ls
6a143876-39c6-4b4a-8056-c3d7fbe0ce75
删除镜像使用命令glance image-delete 镜像id
4.4.7 确认上传图像并验证属性
openstack image list
+--------------------------------------+--------+--------+
| ID                                   | Name   | Status |
+--------------------------------------+--------+--------+
| ac21b17b-e910-4ca4-b743-914b8fbd0e55 | cirros | active |
+--------------------------------------+--------+--------+
到此,控制节点镜像服务glance安装完成!!!
5.控制节点和计算节点计算服务nova安装
nova相关服务
| 服务名称 | 作用 |
|---|---|
| nova-api | 接受并响应所有的计算服务请求,管理虚拟机(云主机)生命周期 |
| nova-api-metadata | 接受来自虚拟机发送的元数据请求 |
| nova-compute(多个) | 真正管理虚拟机 |
| nova-scheduler | nova调度器(挑选出最合适的nova-compute来创建虚机) |
| nova-conductor | 帮助nova-compute代理修改数据库中虚�拟机的状态 |
| nova-network | 早期openstack版本管理虚拟机的网络(已弃用,neutron) |
| nova-consoleauth和nova-novncproxy | web版的vnc来直接操作云主机 |
| novncproxy | web版 vnc客户端 |
安装和配置控制节点
5.1 创建nova和nova-api数据库并授权
#用以下命令
mysql -e "CREATE DATABASE nova;"
mysql -e "CREATE DATABASE nova_api;"
mysql -e "GRANT ALL PRIVILEGES ON nova_api.* TO 'nova'@'localhost' \
IDENTIFIED BY 'NOVA_DBPASS';"
mysql -e "GRANT ALL PRIVILEGES ON nova_api.* TO 'nova'@'%' \
IDENTIFIED BY 'NOVA_DBPASS';"
mysql -e "GRANT ALL PRIVILEGES ON nova.* TO 'nova'@'localhost' \
IDENTIFIED BY 'NOVA_DBPASS';"
mysql -e "GRANT ALL PRIVILEGES ON nova.* TO 'nova'@'%' \
IDENTIFIED BY 'NOVA_DBPASS';"
5.2 获取管理员凭据以获取对仅管理员CLI命令的访问权限
source /opt/admin-openrc
5.3 创建服务凭据
1.创建nova用户,密码设置为NOVA_PASS      //这里交互式创建密码和非交互式选择其中一种
#非交互式创建密码
openstack user create --domain default \
--password NOVA_PASS nova
+-----------+----------------------------------+
| Field     | Value                            |
+-----------+----------------------------------+
| domain_id | af51b1180eb14a66b0380e4cd134df90 |
| enabled   | True                             |
| id        | 1ad918dc1de84c279999e89bb7c312bc |
| name      | nova                             |
+-----------+----------------------------------+

#交互式创建密码
openstack user create --domain default \
--password-prompt nova
User Password:
Repeat User Password:
+-----------+----------------------------------+
| Field     | Value                            |
+-----------+----------------------------------+
| domain_id | b245194b1e8749d0b3c51a78e05d7734 |
| enabled   | True                             |
| id        | b7cd769660c64b96bed91baebb229d54 |
| name      | nova                             |
+-----------+----------------------------------+

2.将admin角色添加到nova用户
openstack role add --project service --user nova admin

3.创建nova服务实体
openstack service create --name nova \
--description "OpenStack Compute" compute
+-------------+----------------------------------+
| Field       | Value                            |
+-------------+----------------------------------+
| description | OpenStack Compute                |
| enabled     | True                             |
| id          | 3db049ab4b334d6d979a9ee9a6aea5d5 |
| name        | nova                             |
| type        | compute                          |
+-------------+----------------------------------+
5.4 创建Compute服务API端点
openstack endpoint create --region RegionOne \
compute public http://controller:8774/v2.1/%\(tenant_id\)s
+--------------+-------------------------------------------+
| Field        | Value                                     |
+--------------+-------------------------------------------+
| enabled      | True                                      |
| id           | 0e1da405775b4a238f4142d8df6b8b58          |
| interface    | public                                    |
| region       | RegionOne                                 |
| region_id    | RegionOne                                 |
| service_id   | 3db049ab4b334d6d979a9ee9a6aea5d5          |
| service_name | nova                                      |
| service_type | compute                                   |
| url          | http://controller:8774/v2.1/%(tenant_id)s |
+--------------+-------------------------------------------+

openstack endpoint create --region RegionOne \
compute internal http://controller:8774/v2.1/%\(tenant_id\)s
+--------------+-------------------------------------------+
| Field        | Value                                     |
+--------------+-------------------------------------------+
| enabled      | True                                      |
| id           | 36775f0fcbf24ce1888ff714442aea04          |
| interface    | internal                                  |
| region       | RegionOne                                 |
| region_id    | RegionOne                                 |
| service_id   | 3db049ab4b334d6d979a9ee9a6aea5d5          |
| service_name | nova                                      |
| service_type | compute                                   |
| url          | http://controller:8774/v2.1/%(tenant_id)s |
+--------------+-------------------------------------------+

openstack endpoint create --region RegionOne \
compute admin http://controller:8774/v2.1/%\(tenant_id\)s
+--------------+-------------------------------------------+
| Field        | Value                                     |
+--------------+-------------------------------------------+
| enabled      | True                                      |
| id           | 8d575d9584df4c0cb3d903c50688175f          |
| interface    | admin                                     |
| region       | RegionOne                                 |
| region_id    | RegionOne                                 |
| service_id   | 3db049ab4b334d6d979a9ee9a6aea5d5          |
| service_name | nova                                      |
| service_type | compute                                   |
| url          | http://controller:8774/v2.1/%(tenant_id)s |
+--------------+-------------------------------------------+
5.5 安装和配置组件
5.5.1 安装包
yum -y install openstack-nova-api openstack-nova-conductor \
openstack-nova-console openstack-nova-novncproxy openstack-nova-scheduler
5.5.2 编辑/etc/nova/nova.conf文件并完成以下操作
1.在[DEFAULT]部分中,仅启用计算和元数据API
[DEFAULT]
...
enabled_apis = osapi_compute,metadata

2.在[api_database]和[database]部分中,配置数据库访问
[api_database]
...
connection = mysql+pymysql://nova:NOVA_DBPASS@controller/nova_api

[database]
...
connection = mysql+pymysql://nova:NOVA_DBPASS@controller/nova

3.在[DEFAULT]和[oslo_messaging_rabbit]部分中,配置RabbitMQ消息队列访问
[DEFAULT]
...
rpc_backend = rabbit

[oslo_messaging_rabbit]
...
rabbit_host = controller
rabbit_userid = openstack
rabbit_password = RABBIT_PASS

4.在[DEFAULT]和[keystone_authtoken]部分中,配置身份服务访问
[DEFAULT]
...
auth_strategy = keystone

[keystone_authtoken]
...
auth_uri = http://controller:5000
auth_url = http://controller:35357
memcached_servers = controller:11211
auth_type = password
project_domain_name = default
user_domain_name = default
project_name = service
username = nova
password = NOVA_PASS

5.在[DEFAULT]部分中,配置my_ip选项以使用控制器节点的管理接口IP地址
[DEFAULT]
...
my_ip = 10.0.0.11

6.在[DEFAULT]部分中,启用对Networking服务的支持
[DEFAULT]
...
use_neutron = True
firewall_driver = nova.virt.firewall.NoopFirewallDriver

7.在[vnc]部分中,配置VNC代理以使用控制器节点的管理接口IP地址
[vnc]
...
vncserver_listen = $my_ip
vncserver_proxyclient_address = $my_ip

8.在[glance]部分中,配置Image服务API的位置
[glance]
...
api_servers = http://controller:9292

9.在[oslo_concurrency]部分中,配置锁定路径
[oslo_concurrency]
...
lock_path = /var/lib/nova/tmp

#用以下命令修改,分开复制,一次性复制无法都执行
cp /etc/nova/nova.conf{,.bak}
grep '^[a-Z\[]' /etc/nova/nova.conf.bak >/etc/nova/nova.conf
openstack-config --set /etc/nova/nova.conf  DEFAULT enabled_apis  osapi_compute,metadata
openstack-config --set /etc/nova/nova.conf  DEFAULT rpc_backend  rabbit
openstack-config --set /etc/nova/nova.conf  DEFAULT auth_strategy  keystone
openstack-config --set /etc/nova/nova.conf  DEFAULT my_ip  10.0.0.11
openstack-config --set /etc/nova/nova.conf  DEFAULT use_neutron  True
openstack-config --set /etc/nova/nova.conf  DEFAULT firewall_driver  nova.virt.firewall.NoopFirewallDriver
openstack-config --set /etc/nova/nova.conf  api_database connection  mysql+pymysql://nova:NOVA_DBPASS@controller/nova_api
openstack-config --set /etc/nova/nova.conf  database  connection  mysql+pymysql://nova:NOVA_DBPASS@controller/nova
openstack-config --set /etc/nova/nova.conf  glance api_servers  http://controller:9292
openstack-config --set /etc/nova/nova.conf  keystone_authtoken  auth_uri  http://controller:5000
openstack-config --set /etc/nova/nova.conf  keystone_authtoken  auth_url  http://controller:35357
openstack-config --set /etc/nova/nova.conf  keystone_authtoken  memcached_servers  controller:11211
openstack-config --set /etc/nova/nova.conf  keystone_authtoken  auth_type  password
openstack-config --set /etc/nova/nova.conf  keystone_authtoken  project_domain_name  default
openstack-config --set /etc/nova/nova.conf  keystone_authtoken  user_domain_name  default
openstack-config --set /etc/nova/nova.conf  keystone_authtoken  project_name  service
openstack-config --set /etc/nova/nova.conf  keystone_authtoken  username  nova
openstack-config --set /etc/nova/nova.conf  keystone_authtoken  password  NOVA_PASS
openstack-config --set /etc/nova/nova.conf  oslo_concurrency lock_path  /var/lib/nova/tmp
openstack-config --set /etc/nova/nova.conf  oslo_messaging_rabbit   rabbit_host  controller
openstack-config --set /etc/nova/nova.conf  oslo_messaging_rabbit   rabbit_userid  openstack
openstack-config --set /etc/nova/nova.conf  oslo_messaging_rabbit   rabbit_password  RABBIT_PASS
openstack-config --set /etc/nova/nova.conf  vnc vncserver_listen  '$my_ip'
openstack-config --set /etc/nova/nova.conf  vnc vncserver_proxyclient_address  '$my_ip'

MD5值
md5sum /etc/nova/nova.conf
47ded61fdd1a79ab91bdb37ce59ef192  /etc/nova/nova.conf
5.5.3 同步数据库,忽略输出
su -s /bin/sh -c "nova-manage api_db sync" nova
su -s /bin/sh -c "nova-manage db sync" nova
/usr/lib/python2.7/site-packages/pymysql/cursors.py:170: Warning: (1831, u'Duplicate index `block_device_mapping_instance_uuid_virtual_name_device_name_idx`. This is deprecated and will be disallowed in a future release.')
  result = self._query(query)
/usr/lib/python2.7/site-packages/pymysql/cursors.py:170: Warning: (1831, u'Duplicate index `uniq_instances0uuid`. This is deprecated and will be disallowed in a future release.')
  result = self._query(query)


#查看数据库,有输出即为正确
mysql nova_api -e "show tables;"|wc -l
10
mysql nova -e "show tables;"|wc -l
110
5.5.4 启动Compute服务并将其配置为在系统引导时启动
systemctl enable openstack-nova-api.service \
openstack-nova-consoleauth.service openstack-nova-scheduler.service \
openstack-nova-conductor.service openstack-nova-novncproxy.service

systemctl start openstack-nova-api.service \
openstack-nova-consoleauth.service openstack-nova-scheduler.service \
openstack-nova-conductor.service openstack-nova-novncproxy.service
安装完成后会有no VNC 10.0.0.11:6080
安装和配置计算节点
5.6 安装和配置组件
5.6.1 安装包
yum -y install openstack-nova-compute openstack-utils
5.6.2 编辑/etc/nova/nova.conf文件并完成以下操作
1.在[DEFAULT]和[oslo_messaging_rabbit]部分中,配置RabbitMQ消息队列访问
[DEFAULT]
...
rpc_backend = rabbit

[oslo_messaging_rabbit]
...
rabbit_host = controller
rabbit_userid = openstack
rabbit_password = RABBIT_PASS

2.在[DEFAULT]和[keystone_authtoken]部分中,配置身份服务访问
[DEFAULT]
...
auth_strategy = keystone

[keystone_authtoken]
...
auth_uri = http://controller:5000
auth_url = http://controller:35357
memcached_servers = controller:11211
auth_type = password
project_domain_name = default
user_domain_name = default
project_name = service
username = nova
password = NOVA_PASS

3.在[DEFAULT]部分中,配置my_ip选项,将MANAGEMENT_INTERFACE_IP_ADDRESS替换为计算节点上管理网络接口的IP地址,对于示例体系结构中的第一个节点,通常为10.0.0.31
[DEFAULT]
...
my_ip = MANAGEMENT_INTERFACE_IP_ADDRESS

4.在[DEFAULT]部分中,启用对Networking服务的支持
[DEFAULT]
...
use_neutron = True
firewall_driver = nova.virt.firewall.NoopFirewallDriver

5.在[vnc]部分中,启用并配置远程控制台访问
[vnc]
...
enabled = True
vncserver_listen = 0.0.0.0
vncserver_proxyclient_address = $my_ip
novncproxy_base_url = http://controller:6080/vnc_auto.html

6.在[glance]部分中,配置Image服务API的位置
[glance]
...
api_servers = http://controller:9292

7.在[oslo_concurrency]部分中,配置锁定路径
[oslo_concurrency]
...
lock_path = /var/lib/nova/tmp

#用以下命令修改
cp /etc/nova/nova.conf{,.bak}
grep '^[a-Z\[]' /etc/nova/nova.conf.bak >/etc/nova/nova.conf
openstack-config --set /etc/nova/nova.conf  DEFAULT rpc_backend  rabbit
openstack-config --set /etc/nova/nova.conf  DEFAULT auth_strategy  keystone
openstack-config --set /etc/nova/nova.conf  DEFAULT my_ip  10.0.0.31
openstack-config --set /etc/nova/nova.conf  DEFAULT use_neutron  True
openstack-config --set /etc/nova/nova.conf  DEFAULT firewall_driver  nova.virt.firewall.NoopFirewallDriver
openstack-config --set /etc/nova/nova.conf  glance api_servers  http://controller:9292
openstack-config --set /etc/nova/nova.conf  keystone_authtoken  auth_uri  http://controller:5000
openstack-config --set /etc/nova/nova.conf  keystone_authtoken  auth_url  http://controller:35357
openstack-config --set /etc/nova/nova.conf  keystone_authtoken  memcached_servers  controller:11211
openstack-config --set /etc/nova/nova.conf  keystone_authtoken  auth_type  password
openstack-config --set /etc/nova/nova.conf  keystone_authtoken  project_domain_name  default
openstack-config --set /etc/nova/nova.conf  keystone_authtoken  user_domain_name  default
openstack-config --set /etc/nova/nova.conf  keystone_authtoken  project_name  service
openstack-config --set /etc/nova/nova.conf  keystone_authtoken  username  nova
openstack-config --set /etc/nova/nova.conf  keystone_authtoken  password  NOVA_PASS
openstack-config --set /etc/nova/nova.conf  oslo_concurrency lock_path  /var/lib/nova/tmp
openstack-config --set /etc/nova/nova.conf  oslo_messaging_rabbit   rabbit_host  controller
openstack-config --set /etc/nova/nova.conf  oslo_messaging_rabbit   rabbit_userid  openstack
openstack-config --set /etc/nova/nova.conf  oslo_messaging_rabbit   rabbit_password  RABBIT_PASS
openstack-config --set /etc/nova/nova.conf  vnc enabled  True
openstack-config --set /etc/nova/nova.conf  vnc vncserver_listen  0.0.0.0
openstack-config --set /etc/nova/nova.conf  vnc vncserver_proxyclient_address  '$my_ip'
openstack-config --set /etc/nova/nova.conf  vnc novncproxy_base_url  http://controller:6080/vnc_auto.html


MD5值
md5sum /etc/nova/nova.conf
2f53f4e0848bc5927493925a4ea61f63  /etc/nova/nova.conf
5.6.3 确定您的计算节点是否支持虚拟机的硬件加速
egrep -c '(vmx|svm)' /proc/cpuinfo
1

#说明
如果此命令返回值1或更大,则计算节点支持硬件加速,通常不需要其他配置。
如果此命令返回零值,则计算节点不支持硬件加速,您必须将libvirt配置为使用QEMU而不是KVM。
编辑/etc/nova/nova.conf文件中的[libvirt]部分, 如下所示:
[libvirt]
......
virt_type = qemu
5.6.4 启动Compute服务及其依赖项,并将它们配置为在系统引导时自动启动
systemctl enable libvirtd.service openstack-nova-compute.service && \
systemctl start libvirtd.service openstack-nova-compute.service
验证操作,在控制节点执行
5.7 验证Compute服务的运行
5.7.1 获取管理员凭据以获取对仅管理员CLI命令的访问权限
source /opt/admin-openrc
5.7.2 列出服务组件以验证每个进程的成功启动和注册
此输出应指示控制器节点上启用的三个服务组件以及计算节点上启用的一个服务组件
openstack compute service list
+----+------------------+------------+----------+---------+-------+----------------------------+
| Id | Binary           | Host       | Zone     | Status  | State | Updated At                 |
+----+------------------+------------+----------+---------+-------+----------------------------+
|  1 | nova-conductor   | controller | internal | enabled | up    | 2019-02-01T14:33:13.000000 |
|  2 | nova-consoleauth | controller | internal | enabled | up    | 2019-02-01T14:33:18.000000 |
|  3 | nova-scheduler   | controller | internal | enabled | up    | 2019-02-01T14:33:13.000000 |
|  6 | nova-compute     | compute1   | nova     | enabled | up    | 2019-02-01T14:33:19.000000 |
+----+------------------+------------+----------+---------+-------+----------------------------+
到此,控制节点和计算节点计算服务nova安装完成!!!
6.控制节点、计算节点网络服务neutron安装
neutron相关服务
| 服务名 | 说明 |
|---|---|
| neutron-server | 端口(9696) api 接受和响应外部的网络管理请求 |
| neutron-linuxbridge-agent | 负责创建桥接网卡 |
| neutron-dhcp-agent | 负责分配IP |
| neutron-metadata-agent | 配合nova-metadata-api实现虚拟机的定制化操作 |
| L3-agent | 实现三层网络(网络层) |
安装和配置控制节点
6.1 创建neutron数据库并授权
#用以下命令
mysql -e "CREATE DATABASE neutron;"
mysql -e "GRANT ALL PRIVILEGES ON neutron.* TO 'neutron'@'localhost' \
IDENTIFIED BY 'NEUTRON_DBPASS';"
mysql -e "GRANT ALL PRIVILEGES ON neutron.* TO 'neutron'@'%' \
IDENTIFIED BY 'NEUTRON_DBPASS';"
6.2 获取管理员凭据以获取对仅管理员CLI命令的访问权限
source /opt/admin-openrc
6.3 创建服务凭证
6.3.1 创建neutron用户,密码设置为NEUTRON_PASS
//这里交互式创建密码和非交互式选择其中一种
#非交互式创建密码
openstack user create --domain default --password NEUTRON_PASS neutron
+-----------+----------------------------------+
| Field     | Value                            |
+-----------+----------------------------------+
| domain_id | af51b1180eb14a66b0380e4cd134df90 |
| enabled   | True                             |
| id        | c0ac0eda2eca4a698eade50b060dd2ce |
| name      | neutron                          |
+-----------+----------------------------------+

#交互式创建密码
openstack user create --domain default --password-prompt neutron
User Password:
Repeat User Password:
+-----------+----------------------------------+
| Field     | Value                            |
+-----------+----------------------------------+
| domain_id | b245194b1e8749d0b3c51a78e05d7734 |
| enabled   | True                             |
| id        | 98f34dc4ddf346b3833de4a0320f7bc9 |
| name      | neutron                          |
+-----------+----------------------------------+
6.3.2 将admin角色添加到neutron用户
openstack role add --project service --user neutron admin
6.3.3 创建neutron服务实体
openstack service create --name neutron \
--description "OpenStack Networking" network
+-------------+----------------------------------+
| Field       | Value                            |
+-------------+----------------------------------+
| description | OpenStack Networking             |
| enabled     | True                             |
| id          | 86251b67e0c94b699489ee1b331c33a6 |
| name        | neutron                          |
| type        | network                          |
+-------------+----------------------------------+
6.4 创建网络服务API端点
openstack endpoint create --region RegionOne \
network public http://controller:9696
+--------------+----------------------------------+
| Field        | Value                            |
+--------------+----------------------------------+
| enabled      | True                             |
| id           | 48b0ab77e4e74a0788f88b0916e8b696 |
| interface    | public                           |
| region       | RegionOne                        |
| region_id    | RegionOne                        |
| service_id   | 86251b67e0c94b699489ee1b331c33a6 |
| service_name | neutron                          |
| service_type | network                          |
| url          | http://controller:9696           |
+--------------+----------------------------------+

openstack endpoint create --region RegionOne \
network internal http://controller:9696
+--------------+----------------------------------+
| Field        | Value                            |
+--------------+----------------------------------+
| enabled      | True                             |
| id           | 5b2be24de46f455694a77e8a096916fb |
| interface    | internal                         |
| region       | RegionOne                        |
| region_id    | RegionOne                        |
| service_id   | 86251b67e0c94b699489ee1b331c33a6 |
| service_name | neutron                          |
| service_type | network                          |
| url          | http://controller:9696           |
+--------------+----------------------------------+

openstack endpoint create --region RegionOne \
network admin http://controller:9696
+--------------+----------------------------------+
| Field        | Value                            |
+--------------+----------------------------------+
| enabled      | True                             |
| id           | 0f06a3d409bc41cb9b6651de68006102 |
| interface    | admin                            |
| region       | RegionOne                        |
| region_id    | RegionOne                        |
| service_id   | 86251b67e0c94b699489ee1b331c33a6 |
| service_name | neutron                          |
| service_type | network                          |
| url          | http://controller:9696           |
+--------------+----------------------------------+
6.5 配置网络选项,控制节点操作
6.5.1 安装包
yum -y install openstack-neutron openstack-neutron-ml2 \
openstack-neutron-linuxbridge ebtables
6.5.2 配置服务器组件
编辑/etc/neutron/neutron.conf文件并完成以下操作
1.在[database]部分中,配置数据库访问:
[database]
...
connection = mysql+pymysql://neutron:NEUTRON_DBPASS@controller/neutron

2.在[DEFAULT]部分中,启用Modular Layer 2(ML2)插件并禁用其他插件:
[DEFAULT]
...
core_plugin = ml2
service_plugins =

3.在[DEFAULT]和[oslo_messaging_rabbit]部分中,配置RabbitMQ消息队列访问:
[DEFAULT]
...
rpc_backend = rabbit

[oslo_messaging_rabbit]
...
rabbit_host = controller
rabbit_userid = openstack
rabbit_password = RABBIT_PASS

4.在[DEFAULT]和[keystone_authtoken]部分中,配置身份服务访问:
[DEFAULT]
...
auth_strategy = keystone

[keystone_authtoken]
...
auth_uri = http://controller:5000
auth_url = http://controller:35357
memcached_servers = controller:11211
auth_type = password
project_domain_name = default
user_domain_name = default
project_name = service
username = neutron
password = NEUTRON_PASS

5.在[DEFAULT]和[nova]部分中,配置Networking以通知Compute网络拓扑更改:
[DEFAULT]
...
notify_nova_on_port_status_changes = True
notify_nova_on_port_data_changes = True

[nova]
...
auth_url = http://controller:35357
auth_type = password
project_domain_name = default
user_domain_name = default
region_name = RegionOne
project_name = service
username = nova
password = NOVA_PASS

6.在[oslo_concurrency]部分中,配置锁定路径:
[oslo_concurrency]
...
lock_path = /var/lib/neutron/tmp

#用以下命令修改
\cp /etc/neutron/neutron.conf{,.bak}
grep '^[a-Z\[]' /etc/neutron/neutron.conf.bak >/etc/neutron/neutron.conf
openstack-config --set /etc/neutron/neutron.conf  DEFAULT core_plugin  ml2
openstack-config --set /etc/neutron/neutron.conf  DEFAULT service_plugins
openstack-config --set /etc/neutron/neutron.conf  DEFAULT rpc_backend  rabbit
openstack-config --set /etc/neutron/neutron.conf  DEFAULT auth_strategy  keystone
openstack-config --set /etc/neutron/neutron.conf  DEFAULT notify_nova_on_port_status_changes  True
openstack-config --set /etc/neutron/neutron.conf  DEFAULT notify_nova_on_port_data_changes  True
openstack-config --set /etc/neutron/neutron.conf  database connection  mysql+pymysql://neutron:NEUTRON_DBPASS@controller/neutron
openstack-config --set /etc/neutron/neutron.conf  keystone_authtoken auth_uri  http://controller:5000
openstack-config --set /etc/neutron/neutron.conf  keystone_authtoken auth_url  http://controller:35357
openstack-config --set /etc/neutron/neutron.conf  keystone_authtoken memcached_servers  controller:11211
openstack-config --set /etc/neutron/neutron.conf  keystone_authtoken auth_type  password
openstack-config --set /etc/neutron/neutron.conf  keystone_authtoken project_domain_name  default
openstack-config --set /etc/neutron/neutron.conf  keystone_authtoken user_domain_name  default
openstack-config --set /etc/neutron/neutron.conf  keystone_authtoken project_name  service
openstack-config --set /etc/neutron/neutron.conf  keystone_authtoken username  neutron
openstack-config --set /etc/neutron/neutron.conf  keystone_authtoken password  NEUTRON_PASS
openstack-config --set /etc/neutron/neutron.conf  nova auth_url  http://controller:35357
openstack-config --set /etc/neutron/neutron.conf  nova auth_type  password
openstack-config --set /etc/neutron/neutron.conf  nova project_domain_name  default
openstack-config --set /etc/neutron/neutron.conf  nova user_domain_name  default
openstack-config --set /etc/neutron/neutron.conf  nova region_name  RegionOne
openstack-config --set /etc/neutron/neutron.conf  nova project_name  service
openstack-config --set /etc/neutron/neutron.conf  nova username  nova
openstack-config --set /etc/neutron/neutron.conf  nova password  NOVA_PASS
openstack-config --set /etc/neutron/neutron.conf  oslo_concurrency lock_path  /var/lib/neutron/tmp
openstack-config --set /etc/neutron/neutron.conf  oslo_messaging_rabbit rabbit_host  controller
openstack-config --set /etc/neutron/neutron.conf  oslo_messaging_rabbit rabbit_userid  openstack
openstack-config --set /etc/neutron/neutron.conf  oslo_messaging_rabbit rabbit_password  RABBIT_PASS

MD5值
md5sum /etc/neutron/neutron.conf
e399b7958cd22f47becc6d8fd6d3521a  /etc/neutron/neutron.conf
6.6 配置模块化第2层(ML2)插件
ML2插件使用Linux桥接机制为实例构建第2层(桥接和交换)虚拟网络基础架构
编辑/etc/neutron/plugins/ml2/ml2_conf.ini文件并完成以下操作
1.在[ml2]部分中,启用flat和VLAN网络:
[ml2]
...
type_drivers = flat,vlan

2.在[ml2]部分中,禁用自助服务网络
[ml2]
...
tenant_network_types =

3.在[ml2]部分中,启用Linux桥接机制
[ml2]
...
mechanism_drivers = linuxbridge

4.在[ml2]部分中,启用端口安全性扩展驱动程序
[ml2]
...
extension_drivers = port_security

5.在[ml2_type_flat]部分中,将提供商虚拟网络配置为扁平网络:
[ml2_type_flat]
...
flat_networks = provider

6.在[securitygroup]部分中,启用ipset以提高安全组规则的效率
[securitygroup]
...
enable_ipset = True

#用以下命令修改
\cp /etc/neutron/plugins/ml2/ml2_conf.ini{,.bak}
grep '^[a-Z\[]' /etc/neutron/plugins/ml2/ml2_conf.ini.bak >/etc/neutron/plugins/ml2/ml2_conf.ini
openstack-config --set /etc/neutron/plugins/ml2/ml2_conf.ini  ml2 type_drivers  flat,vlan
openstack-config --set /etc/neutron/plugins/ml2/ml2_conf.ini  ml2 tenant_network_types
openstack-config --set /etc/neutron/plugins/ml2/ml2_conf.ini  ml2 mechanism_drivers  linuxbridge
openstack-config --set /etc/neutron/plugins/ml2/ml2_conf.ini  ml2 extension_drivers  port_security
openstack-config --set /etc/neutron/plugins/ml2/ml2_conf.ini  ml2_type_flat flat_networks  provider
openstack-config --set /etc/neutron/plugins/ml2/ml2_conf.ini  securitygroup enable_ipset  True

MD5值
md5sum /etc/neutron/plugins/ml2/ml2_conf.ini
2640b5de519fafcd675b30e1bcd3c7d5  /etc/neutron/plugins/ml2/ml2_conf.ini
6.7 配置linux桥接代理
Linux网桥代理为实例构建第2层(桥接和交换)虚拟网络基础架构并处理安全组
编辑/etc/neutron/plugins/ml2/linuxbridge_agent.ini文件并完成以下操作
1.在[linux_bridge]部分中,将提供者虚拟网络映射到提供者物理网络接口,将PROVIDER_INTERFACE_NAME替换
为基础提供程序物理网络接口的名称,这里为eth0
[linux_bridge]
physical_interface_mappings = provider:PROVIDER_INTERFACE_NAME

2.在[vxlan]部分中,禁用VXLAN重叠网络
[vxlan]
enable_vxlan = False

3.在[securitygroup]部分中,启用安全组并配置Linux网桥iptables防火墙驱动程序
[securitygroup]
...
enable_security_group = True
firewall_driver = neutron.agent.linux.iptables_firewall.IptablesFirewallDriver

#用以下命令修改
\cp /etc/neutron/plugins/ml2/linuxbridge_agent.ini{,.bak}
grep '^[a-Z\[]' /etc/neutron/plugins/ml2/linuxbridge_agent.ini.bak >/etc/neutron/plugins/ml2/linuxbridge_agent.ini
openstack-config --set /etc/neutron/plugins/ml2/linuxbridge_agent.ini  linux_bridge physical_interface_mappings  provider:eth0
openstack-config --set /etc/neutron/plugins/ml2/linuxbridge_agent.ini  securitygroup enable_security_group  True
openstack-config --set /etc/neutron/plugins/ml2/linuxbridge_agent.ini  securitygroup firewall_driver  neutron.agent.linux.iptables_firewall.IptablesFirewallDriver
openstack-config --set /etc/neutron/plugins/ml2/linuxbridge_agent.ini  vxlan enable_vxlan  False

MD5值
md5sum /etc/neutron/plugins/ml2/linuxbridge_agent.ini
3f474907a7f438b34563e4d3f3c29538  /etc/neutron/plugins/ml2/linuxbridge_agent.ini
6.8 配置DHCP代理
该DHCP代理为虚拟网络提供DHCP服务
编辑/etc/neutron/dhcp_agent.ini文件并完成以下操作
1.在[DEFAULT]部分中,配置Linux桥接接口驱动程序,Dnsmasq DHCP驱动程序,并启用隔离的元数据,以便提供商网络上的实例可以通过网络访问元数据
[DEFAULT]
...
interface_driver = neutron.agent.linux.interface.BridgeInterfaceDriver
dhcp_driver = neutron.agent.linux.dhcp.Dnsmasq
enable_isolated_metadata = True

#用以下命令修改
\cp /etc/neutron/dhcp_agent.ini{,.bak}
grep '^[a-Z\[]' /etc/neutron/dhcp_agent.ini.bak >/etc/neutron/dhcp_agent.ini
openstack-config --set /etc/neutron/dhcp_agent.ini DEFAULT interface_driver neutron.agent.linux.interface.BridgeInterfaceDriver
openstack-config --set /etc/neutron/dhcp_agent.ini DEFAULT dhcp_driver neutron.agent.linux.dhcp.Dnsmasq
openstack-config --set /etc/neutron/dhcp_agent.ini DEFAULT enable_isolated_metadata True

MD5值
md5sum /etc/neutron/dhcp_agent.ini
d39579607b2f7d92e88f8910f9213520  /etc/neutron/dhcp_agent.ini
6.9 配置元数据代理
所述元数据代理提供配置信息的诸如凭据实例。
编辑/etc/neutron/metadata_agent.ini文件并完成以下操作
在[DEFAULT]部分中,配置元数据主机和共享密钥
[DEFAULT]
...
nova_metadata_ip = controller
metadata_proxy_shared_secret = METADATA_SECRET

#用以下领命修改
\cp /etc/neutron/metadata_agent.ini{,.bak}
grep '^[a-Z\[]' /etc/neutron/metadata_agent.ini.bak >/etc/neutron/metadata_agent.ini
openstack-config --set /etc/neutron/metadata_agent.ini DEFAULT nova_metadata_ip controller
openstack-config --set /etc/neutron/metadata_agent.ini DEFAULT metadata_proxy_shared_secret METADATA_SECRET

MD5值
md5sum /etc/neutron/metadata_agent.ini
e1166b0dfcbcf4507d50860d124335d6  /etc/neutron/metadata_agent.ini
6.10 配置计算以使用网络
编辑/etc/nova/nova.conf文件并执行以下操作:
在[neutron]部分中,配置访问参数,启用元数据代理并配置密码
[neutron]
...
url = http://controller:9696
auth_url = http://controller:35357
auth_type = password
project_domain_name = default
user_domain_name = default
region_name = RegionOne
project_name = service
username = neutron
password = NEUTRON_PASS

service_metadata_proxy = True
metadata_proxy_shared_secret = METADATA_SECRET

#用以下命令修改
openstack-config --set /etc/nova/nova.conf  neutron url  http://controller:9696
openstack-config --set /etc/nova/nova.conf  neutron auth_url  http://controller:35357
openstack-config --set /etc/nova/nova.conf  neutron auth_type  password
openstack-config --set /etc/nova/nova.conf  neutron project_domain_name  default
openstack-config --set /etc/nova/nova.conf  neutron user_domain_name  default
openstack-config --set /etc/nova/nova.conf  neutron region_name  RegionOne
openstack-config --set /etc/nova/nova.conf  neutron project_name  service
openstack-config --set /etc/nova/nova.conf  neutron username  neutron
openstack-config --set /etc/nova/nova.conf  neutron password  NEUTRON_PASS
openstack-config --set /etc/nova/nova.conf  neutron service_metadata_proxy  True
openstack-config --set /etc/nova/nova.conf  neutron metadata_proxy_shared_secret METADATA_SECRET

MD5值
md5sum /etc/nova/nova.conf
6334f359655efdbcf083b812ab94efc1  /etc/nova/nova.conf
6.11 完成安装
6.11.1 联网服务初始化脚本期待一个符号链接 /etc/neutron/plugin.ini指向ML2插件配置文件,/etc/neutron/plugins/ml2/ml2_conf.ini。如果此符号链接不存在,请使用以下命令创建它
ln -s /etc/neutron/plugins/ml2/ml2_conf.ini /etc/neutron/plugin.ini
6.11.2 同步数据库,最后提示OK即为正确
su -s /bin/sh -c "neutron-db-manage --config-file /etc/neutron/neutron.conf \
--config-file /etc/neutron/plugins/ml2/ml2_conf.ini upgrade head" neutron
6.11.3 重新启动Compute API服务
systemctl restart openstack-nova-api.service
6.11.4 启动网络服务并将其配置为在系统引导时启动
对于官网中的两种网络,这里选择的是第一种网络
#启动网络服务并设置开机自启
systemctl enable neutron-server.service \
neutron-linuxbridge-agent.service neutron-dhcp-agent.service \
neutron-metadata-agent.service

systemctl start neutron-server.service \
neutron-linuxbridge-agent.service neutron-dhcp-agent.service \
neutron-metadata-agent.service

#启动服务后提示如下即为正确,alive处都为笑脸     //注意,此处启动比较慢,需要等待几分钟
neutron agent-list
+--------------------------------------+--------------------+------------+-------------------+-------+----------------+---------------------------+
| id                                   | agent_type         | host       | availability_zone | alive | admin_state_up | binary                    |
+--------------------------------------+--------------------+------------+-------------------+-------+----------------+---------------------------+
| 2a79bce3-2492-4d5b-b565-6f18aa7c8bcd | DHCP agent         | controller | nova              | :-)   | True           | neutron-dhcp-agent        |
| 2b3799ae-3162-47f7-82fa-6291d76e0e14 | Metadata agent     | controller |                   | :-)   | True           | neutron-metadata-agent    |
| 82ff3326-f570-4f50-bb5c-eec057034fd1 | Linux bridge agent | controller |                   | :-)   | True           | neutron-linuxbridge-agent |
+--------------------------------------+--------------------+------------+-------------------+-------+----------------+---------------------------+
安装和配置计算节点
6.12 安装包
yum -y install openstack-neutron-linuxbridge ebtables ipset openstack-utils
6.13 配置公共组件
编辑/etc/neutron/neutron.conf文件并完成以下操作
1.在[database]部分中,注释掉任何连接选项,因为计算节点不直接访问数据库。
在[DEFAULT]和[oslo_messaging_rabbit]部分中,配置RabbitMQ消息队列访问
[DEFAULT]
...
rpc_backend = rabbit

[oslo_messaging_rabbit]
...
rabbit_host = controller
rabbit_userid = openstack
rabbit_password = RABBIT_PASS

2.在[DEFAULT]和[keystone_authtoken]部分中,配置身份服务访问
[DEFAULT]
...
auth_strategy = keystone

[keystone_authtoken]
...
auth_uri = http://controller:5000
auth_url = http://controller:35357
memcached_servers = controller:11211
auth_type = password
project_domain_name = default
user_domain_name = default
project_name = service
username = neutron
password = NEUTRON_PASS

3.在[oslo_concurrency]部分中,配置锁定路径
[oslo_concurrency]
...
lock_path = /var/lib/neutron/tmp

#用以下命令修改
\cp /etc/neutron/neutron.conf{,.bak}
grep '^[a-Z\[]' /etc/neutron/neutron.conf.bak >/etc/neutron/neutron.conf
openstack-config --set /etc/neutron/neutron.conf  DEFAULT rpc_backend  rabbit
openstack-config --set /etc/neutron/neutron.conf  DEFAULT auth_strategy  keystone
openstack-config --set /etc/neutron/neutron.conf  keystone_authtoken auth_uri  http://controller:5000
openstack-config --set /etc/neutron/neutron.conf  keystone_authtoken auth_url  http://controller:35357
openstack-config --set /etc/neutron/neutron.conf  keystone_authtoken memcached_servers  controller:11211
openstack-config --set /etc/neutron/neutron.conf  keystone_authtoken auth_type  password
openstack-config --set /etc/neutron/neutron.conf  keystone_authtoken project_domain_name  default
openstack-config --set /etc/neutron/neutron.conf  keystone_authtoken user_domain_name  default
openstack-config --set /etc/neutron/neutron.conf  keystone_authtoken project_name  service
openstack-config --set /etc/neutron/neutron.conf  keystone_authtoken username  neutron
openstack-config --set /etc/neutron/neutron.conf  keystone_authtoken password  NEUTRON_PASS
openstack-config --set /etc/neutron/neutron.conf  oslo_concurrency lock_path  /var/lib/neutron/tmp
openstack-config --set /etc/neutron/neutron.conf  oslo_messaging_rabbit rabbit_host  controller
openstack-config --set /etc/neutron/neutron.conf  oslo_messaging_rabbit rabbit_userid  openstack
openstack-config --set /etc/neutron/neutron.conf  oslo_messaging_rabbit rabbit_password  RABBIT_PASS

MD5值
md5sum /etc/neutron/neutron.conf
77ffab503797be5063c06e8b956d6ed0  /etc/neutron/neutron.conf
6.14 配置网络选项
6.14.1 配置桥接代理
Linux网桥代理为实例构建第2层(桥接和交换)虚拟网络基础架构并处理安全组。
编辑/etc/neutron/plugins/ml2/linuxbridge_agent.ini文件并完成以下操作:
1.在[linux_bridge]部分中,将提供者虚拟网络映射到提供者物理网络接口,这里为eth0
[linux_bridge]
physical_interface_mappings = provider:PROVIDER_INTERFACE_NAME

2.在[vxlan]部分中,禁用VXLAN重叠网络
[vxlan]
enable_vxlan = False

3.在[securitygroup]部分中,启用安全组并配置Linux网桥iptables防火墙驱动程序
[securitygroup]
...
enable_security_group = True
firewall_driver = neutron.agent.linux.iptables_firewall.IptablesFirewallDriver

#用以下命令修改
\cp /etc/neutron/plugins/ml2/linuxbridge_agent.ini{,.bak}
grep '^[a-Z\[]' /etc/neutron/plugins/ml2/linuxbridge_agent.ini.bak >/etc/neutron/plugins/ml2/linuxbridge_agent.ini
openstack-config --set /etc/neutron/plugins/ml2/linuxbridge_agent.ini linux_bridge physical_interface_mappings provider:eth0
openstack-config --set /etc/neutron/plugins/ml2/linuxbridge_agent.ini vxlan enable_vxlan False
openstack-config --set /etc/neutron/plugins/ml2/linuxbridge_agent.ini securitygroup enable_security_group True
openstack-config --set /etc/neutron/plugins/ml2/linuxbridge_agent.ini securitygroup firewall_driver neutron.agent.linux.iptables_firewall.IptablesFirewallDriver

MD5值
md5sum /etc/neutron/plugins/ml2/linuxbridge_agent.ini
3f474907a7f438b34563e4d3f3c29538  /etc/neutron/plugins/ml2/linuxbridge_agent.ini
6.14.2 配置计算以使用网络
编辑/etc/nova/nova.conf文件并完成以下操作
在[neutron]部分中,配置访问参数
[neutron]
...
url = http://controller:9696
auth_url = http://controller:35357
auth_type = password
project_domain_name = default
user_domain_name = default
region_name = RegionOne
project_name = service
username = neutron
password = NEUTRON_PASS

#使用以下命令修改
openstack-config --set /etc/nova/nova.conf  neutron url  http://controller:9696 && \
openstack-config --set /etc/nova/nova.conf  neutron auth_url  http://controller:35357 && \
openstack-config --set /etc/nova/nova.conf  neutron auth_type  password && \
openstack-config --set /etc/nova/nova.conf  neutron project_domain_name  default && \
openstack-config --set /etc/nova/nova.conf  neutron user_domain_name  default && \
openstack-config --set /etc/nova/nova.conf  neutron region_name  RegionOne && \
openstack-config --set /etc/nova/nova.conf  neutron project_name  service && \
openstack-config --set /etc/nova/nova.conf  neutron username  neutron && \
openstack-config --set /etc/nova/nova.conf  neutron password  NEUTRON_PASS

MD5值
md5sum /etc/nova/nova.conf
8e6590c8dc3d59beb3da37fdeeadfd1d  /etc/nova/nova.conf
6.15 完成安装
6.15.1 重新启动Compute服务
systemctl restart openstack-nova-compute.service
6.15.2 启动Linux网桥代理并将其配置为在系统引导时启动
systemctl enable neutron-linuxbridge-agent.service && \
systemctl start neutron-linuxbridge-agent.service
6.16 验证操作,在控制节点操作
6.16.1 获取管理员凭据以获取对仅管理员CLI命令的访问权限
source /opt/admin-openrc
6.16.2 列出已加载的扩展以验证neutron-server进程的成功启动
neutron ext-list
+---------------------------+-----------------------------------------------+
| alias                     | name                                          |
+---------------------------+-----------------------------------------------+
| default-subnetpools       | Default Subnetpools                           |
| availability_zone         | Availability Zone                             |
| network_availability_zone | Network Availability Zone                     |
| auto-allocated-topology   | Auto Allocated Topology Services              |
| binding                   | Port Binding                                  |
| agent                     | agent                                         |
| subnet_allocation         | Subnet Allocation                             |
| dhcp_agent_scheduler      | DHCP Agent Scheduler                          |
| tag                       | Tag support                                   |
| external-net              | Neutron external network                      |
| net-mtu                   | Network MTU                                   |
| network-ip-availability   | Network IP Availability                       |
| quotas                    | Quota management support                      |
| provider                  | Provider Network                              |
| multi-provider            | Multi Provider Network                        |
| address-scope             | Address scope                                 |
| timestamp_core            | Time Stamp Fields addition for core resources |
| extra_dhcp_opt            | Neutron Extra DHCP opts                       |
| security-group            | security-group                                |
| rbac-policies             | RBAC Policies                                 |
| standard-attr-description | standard-attr-description                     |
| port-security             | Port Security                                 |
| allowed-address-pairs     | Allowed Address Pairs                         |
+---------------------------+-----------------------------------------------+
6.16.3 列出代理以验证成功启动neutron代理,alive处都为笑脸即为正确
neutron agent-list
+--------------------------------------+--------------------+------------+-------------------+-------+----------------+---------------------------+
| id                                   | agent_type         | host       | availability_zone | alive | admin_state_up | binary                    |
+--------------------------------------+--------------------+------------+-------------------+-------+----------------+---------------------------+
| 2a79bce3-2492-4d5b-b565-6f18aa7c8bcd | DHCP agent         | controller | nova              | :-)   | True           | neutron-dhcp-agent        |
| 2b3799ae-3162-47f7-82fa-6291d76e0e14 | Metadata agent     | controller |                   | :-)   | True           | neutron-metadata-agent    |
| 82ff3326-f570-4f50-bb5c-eec057034fd1 | Linux bridge agent | controller |                   | :-)   | True           | neutron-linuxbridge-agent |
| ee271e44-25c3-4024-b414-40d8fa838d68 | Linux bridge agent | compute1   |                   | :-)   | True           | neutron-linuxbridge-agent |
+--------------------------------------+--------------------+------------+-------------------+-------+----------------+---------------------------+
到此,控制节点、计算节点网络服务neutron安装完成!!!
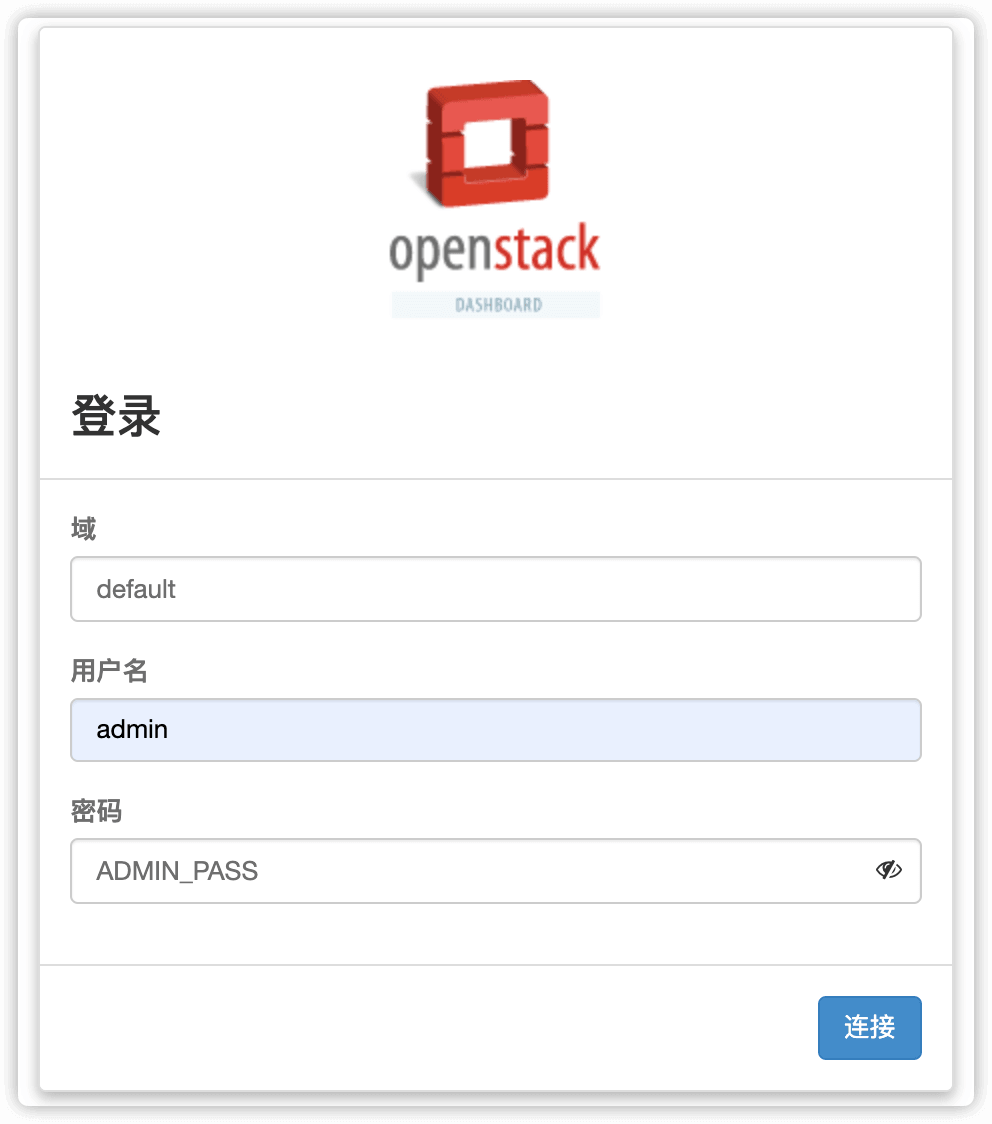
7.计算节点horizon web界面Dashboard安装
7.1 安装包
yum -y install openstack-dashboard
7.2 编辑/etc/openstack-dashboard/local_settings文件并完成以下操作
1.配置仪表板以在控制器节点上使用OpenStack服务
158行,OPENSTACK_HOST = "127.0.0.1"
修改为 OPENSTACK_HOST = "controller"
2.允许所有主机访问仪表板
30行,ALLOWED_HOSTS = ['horizon.example.com', 'localhost']
修改为 ALLOWED_HOSTS = ['*', ]
3.配置memcached会话存储服务
134-142行
CACHES = {
'default': {
'BACKEND': 'django.core.cache.backends.locmem.LocMemCache',
},
}
修改为
SESSION_ENGINE = 'django.contrib.sessions.backends.file'
CACHES = {
'default': {
'BACKEND': 'django.core.cache.backends.memcached.MemcachedCache',
'LOCATION': 'controller:11211',
}
}
4.启用Identity API版本3
161行 OPENSTACK_KEYSTONE_URL = "http://%s:5000/v2.0" % OPENSTACK_HOST
修改为 OPENSTACK_KEYSTONE_URL = "http://%s:5000/v3" % OPENSTACK_HOST
5.启用对域�的支持
65行 #OPENSTACK_KEYSTONE_MULTIDOMAIN_SUPPORT = False
修改为 OPENSTACK_KEYSTONE_MULTIDOMAIN_SUPPORT = True
6.配置API版本
55-60行,取消注释
#OPENSTACK_API_VERSIONS = {
# "data-processing": 1.1,
# "identity": 3,
# "volume": 2,
# "compute": 2,
#}
修改为
OPENSTACK_API_VERSIONS = {
"identity": 3,
"image": 2,
"volume": 2,
}
7.配置default作为您通过仪表盘创建用户的默认域
71行 #OPENSTACK_KEYSTONE_DEFAULT_DOMAIN = 'default'
修改为 OPENSTACK_KEYSTONE_DEFAULT_DOMAIN = "default"
8.将user配置为您通过仪表板创建的用户的默认角色
161行 OPENSTACK_KEYSTONE_DEFAULT_ROLE = "_member_"
修改为 OPENSTACK_KEYSTONE_DEFAULT_ROLE = "user"
9.如果选择网络选项1,请禁用对第3层网络服务的支持
261-270行
OPENSTACK_NEUTRON_NETWORK = {
'enable_router': True,
'enable_quotas': True,
'enable_ipv6': True,
'enable_distributed_router': False,
'enable_ha_router': False,
'enable_lb': True,
'enable_firewall': True,
'enable_vpn': True,
'enable_fip_topology_check': True,
修改为
OPENSTACK_NEUTRON_NETWORK = {
...
'enable_router': False,
'enable_quotas': False,
'enable_distributed_router': False,
'enable_ha_router': False,
'enable_lb': False,
'enable_firewall': False,
'enable_vpn': False,
'enable_fip_topology_check': False,
10.可选)配置时区
371行 TIME_ZONE = "UTC"
修改为 TIME_ZONE = "Asia/Shanghai"
//有BUG,暂时不用
#用以下命令修改
\cp /etc/openstack-dashboard/local_settings{,.bak} && \
sed -i.bak '158cOPENSTACK_HOST = "controller"' /etc/openstack-dashboard/local_settings && \
sed -i '30s/horizon.example.com/*/' /etc/openstack-dashboard/local_settings|sed -i '30s/\x27localhost\x27//' /etc/openstack-dashboard/local_settings && \
sed -i $'137a\t\'LOCATION\': \'controller:11211\',' /etc/openstack-dashboard/local_settings
/etc/openstack-dashboard/local_settings文件内容
# -*- coding: utf-8 -*-

import os

from django.utils.translation import ugettext_lazy as _


from openstack_dashboard import exceptions
from openstack_dashboard.settings import HORIZON_CONFIG

DEBUG = False
TEMPLATE_DEBUG = DEBUG


# WEBROOT is the location relative to Webserver root
# should end with a slash.
WEBROOT = '/dashboard/'
#LOGIN_URL = WEBROOT + 'auth/login/'
#LOGOUT_URL = WEBROOT + 'auth/logout/'
#
# LOGIN_REDIRECT_URL can be used as an alternative for
# HORIZON_CONFIG.user_home, if user_home is not set.
# Do not set it to '/home/', as this will cause circular redirect loop
#LOGIN_REDIRECT_URL = WEBROOT

# If horizon is running in production (DEBUG is False), set this
# with the list of host/domain names that the application can serve.
# For more information see:
# https://docs.djangoproject.com/en/dev/ref/settings/#allowed-hosts
ALLOWED_HOSTS = ['*', ]

# Set SSL proxy settings:
# Pass this header from the proxy after terminating the SSL,
# and don't forget to strip it from the client's request.
# For more information see:
# https://docs.djangoproject.com/en/1.8/ref/settings/#secure-proxy-ssl-header
#SECURE_PROXY_SSL_HEADER = ('HTTP_X_FORWARDED_PROTO', 'https')

# If Horizon is being served through SSL, then uncomment the following two
# settings to better secure the cookies from security exploits
#CSRF_COOKIE_SECURE = True
#SESSION_COOKIE_SECURE = True

# The absolute path to the directory where message files are collected.
# The message file must have a .json file extension. When the user logins to
# horizon, the message files collected are processed and displayed to the user.
#MESSAGES_PATH=None

# Overrides for OpenStack API versions. Use this setting to force the
# OpenStack dashboard to use a specific API version for a given service API.
# Versions specified here should be integers or floats, not strings.
# NOTE: The version should be formatted as it appears in the URL for the
# service API. For example, The identity service APIs have inconsistent
# use of the decimal point, so valid options would be 2.0 or 3.
OPENSTACK_API_VERSIONS = {
#    "data-processing": 1.1,
    "identity": 3,
    "image": 2,
    "volume": 2,
    "compute": 2,
}

# Set this to True if running on multi-domain model. When this is enabled, it
# will require user to enter the Domain name in addition to username for login.
OPENSTACK_KEYSTONE_MULTIDOMAIN_SUPPORT = True

# Overrides the default domain used when running on single-domain model
# with Keystone V3. All entities will be created in the default domain.
# NOTE: This value must be the ID of the default domain, NOT the name.
# Also, you will most likely have a value in the keystone policy file like this
#    "cloud_admin": "rule:admin_required and domain_id:<your domain id>"
# This value must match the domain id specified there.
OPENSTACK_KEYSTONE_DEFAULT_DOMAIN = 'default'

# Set this to True to enable panels that provide the ability for users to
# manage Identity Providers (IdPs) and establish a set of rules to map
# federation protocol attributes to Identity API attributes.
# This extension requires v3.0+ of the Identity API.
#OPENSTACK_KEYSTONE_FEDERATION_MANAGEMENT = False

# Set Console type:
# valid options are "AUTO"(default), "VNC", "SPICE", "RDP", "SERIAL" or None
# Set to None explicitly if you want to deactivate the console.
#CONSOLE_TYPE = "AUTO"

# If provided, a "Report Bug" link will be displayed in the site header
# which links to the value of this setting (ideally a URL containing
# information on how to report issues).
#HORIZON_CONFIG["bug_url"] = "http://bug-report.example.com"

# Show backdrop element outside the modal, do not close the modal
# after clicking on backdrop.
#HORIZON_CONFIG["modal_backdrop"] = "static"

# Specify a regular expression to validate user passwords.
#HORIZON_CONFIG["password_validator"] = {
#    "regex": '.*',
#    "help_text": _("Your password does not meet the requirements."),
#}

# Disable simplified floating IP address management for deployments with
# multiple floating IP pools or complex network requirements.
#HORIZON_CONFIG["simple_ip_management"] = False

# Turn off browser autocompletion for forms including the login form and
# the database creation workflow if so desired.
#HORIZON_CONFIG["password_autocomplete"] = "off"

# Setting this to True will disable the reveal button for password fields,
# including on the login form.
#HORIZON_CONFIG["disable_password_reveal"] = False

LOCAL_PATH = '/tmp'

# Set custom secret key:
# You can either set it to a specific value or you can let horizon generate a
# default secret key that is unique on this machine, e.i. regardless of the
# amount of Python WSGI workers (if used behind Apache+mod_wsgi): However,
# there may be situations where you would want to set this explicitly, e.g.
# when multiple dashboard instances are distributed on different machines
# (usually behind a load-balancer). Either you have to make sure that a session
# gets all requests routed to the same dashboard instance or you set the same
# SECRET_KEY for all of them.
SECRET_KEY='65941f1393ea1c265ad7'

# We recommend you use memcached for development; otherwise after every reload
# of the django development server, you will have to login again. To use
# memcached set CACHES to something like
SESSION_ENGINE = 'django.contrib.sessions.backends.file'
CACHES = {
    'default': {
        'BACKEND': 'django.core.cache.backends.memcached.MemcachedCache',
        'LOCATION': 'controller:11211',
    },
}

#CACHES = {
#    'default': {
#        'BACKEND': 'django.core.cache.backends.locmem.LocMemCache',
#    },
#}

# Send email to the console by default
EMAIL_BACKEND = 'django.core.mail.backends.console.EmailBackend'
# Or send them to /dev/null
#EMAIL_BACKEND = 'django.core.mail.backends.dummy.EmailBackend'

# Configure these for your outgoing email host
#EMAIL_HOST = 'smtp.my-company.com'
#EMAIL_PORT = 25
#EMAIL_HOST_USER = 'djangomail'
#EMAIL_HOST_PASSWORD = 'top-secret!'

# For multiple regions uncomment this configuration, and add (endpoint, title).
#AVAILABLE_REGIONS = [
#    ('http://cluster1.example.com:5000/v2.0', 'cluster1'),
#    ('http://cluster2.example.com:5000/v2.0', 'cluster2'),
#]

OPENSTACK_HOST = "controller"
OPENSTACK_KEYSTONE_URL = "http://%s:5000/v3" % OPENSTACK_HOST
OPENSTACK_KEYSTONE_DEFAULT_ROLE = "user"

# Enables keystone web single-sign-on if set to True.
#WEBSSO_ENABLED = False

# Determines which authentication choice to show as default.
#WEBSSO_INITIAL_CHOICE = "credentials"

# The list of authentication mechanisms which include keystone
# federation protocols and identity provider/federation protocol
# mapping keys (WEBSSO_IDP_MAPPING). Current supported protocol
# IDs are 'saml2' and 'oidc'  which represent SAML 2.0, OpenID
# Connect respectively.
# Do not remove the mandatory credentials mechanism.
# Note: The last two tuples are sample mapping keys to a identity provider
# and federation protocol combination (WEBSSO_IDP_MAPPING).
#WEBSSO_CHOICES = (
#    ("credentials", _("Keystone Credentials")),
#    ("oidc", _("OpenID Connect")),
#    ("saml2", _("Security Assertion Markup Language")),
#    ("acme_oidc", "ACME - OpenID Connect"),
#    ("acme_saml2", "ACME - SAML2"),
#)

# A dictionary of specific identity provider and federation protocol
# combinations. From the selected authentication mechanism, the value
# will be looked up as keys in the dictionary. If a match is found,
# it will redirect the user to a identity provider and federation protocol
# specific WebSSO endpoint in keystone, otherwise it will use the value
# as the protocol_id when redirecting to the WebSSO by protocol endpoint.
# NOTE: The value is expected to be a tuple formatted as: (<idp_id>, <protocol_id>).
#WEBSSO_IDP_MAPPING = {
#    "acme_oidc": ("acme", "oidc"),
#    "acme_saml2": ("acme", "saml2"),
#}

# Disable SSL certificate checks (useful for self-signed certificates):
#OPENSTACK_SSL_NO_VERIFY = True

# The CA certificate to use to verify SSL connections
#OPENSTACK_SSL_CACERT = '/path/to/cacert.pem'

# The OPENSTACK_KEYSTONE_BACKEND settings can be used to identify the
# capabilities of the auth backend for Keystone.
# If Keystone has been configured to use LDAP as the auth backend then set
# can_edit_user to False and name to 'ldap'.
#
# TODO(tres): Remove these once Keystone has an API to identify auth backend.
OPENSTACK_KEYSTONE_BACKEND = {
    'name': 'native',
    'can_edit_user': True,
    'can_edit_group': True,
    'can_edit_project': True,
    'can_edit_domain': True,
    'can_edit_role': True,
}

# Setting this to True, will add a new "Retrieve Password" action on instance,
# allowing Admin session password retrieval/decryption.
#OPENSTACK_ENABLE_PASSWORD_RETRIEVE = False

# The Launch Instance user experience has been significantly enhanced.
# You can choose whether to enable the new launch instance experience,
# the legacy experience, or both. The legacy experience will be removed
# in a future release, but is available as a temporary backup setting to ensure
# compatibility with existing deployments. Further development will not be
# done on the legacy experience. Please report any problems with the new
# experience via the Launchpad tracking system.
#
# Toggle LAUNCH_INSTANCE_LEGACY_ENABLED and LAUNCH_INSTANCE_NG_ENABLED to
# determine the experience to enable.  Set them both to true to enable
# both.
#LAUNCH_INSTANCE_LEGACY_ENABLED = True
#LAUNCH_INSTANCE_NG_ENABLED = False

# A dictionary of settings which can be used to provide the default values for
# properties found in the Launch Instance modal.
#LAUNCH_INSTANCE_DEFAULTS = {
#    'config_drive': False,
#}

# The Xen Hypervisor has the ability to set the mount point for volumes
# attached to instances (other Hypervisors currently do not). Setting
# can_set_mount_point to True will add the option to set the mount point
# from the UI.
OPENSTACK_HYPERVISOR_FEATURES = {
    'can_set_mount_point': False,
    'can_set_password': False,
    'requires_keypair': False,
}

# The OPENSTACK_CINDER_FEATURES settings can be used to enable optional
# services provided by cinder that is not exposed by its extension API.
OPENSTACK_CINDER_FEATURES = {
    'enable_backup': False,
}

# The OPENSTACK_NEUTRON_NETWORK settings can be used to enable optional
# services provided by neutron. Options currently available are load
# balancer service, security groups, quotas, VPN service.
OPENSTACK_NEUTRON_NETWORK = {
    'enable_router': False,
    'enable_quotas': False,
    'enable_ipv6': False,
    'enable_distributed_router': False,
    'enable_ha_router': False,
    'enable_lb': False,
    'enable_firewall': False,
    'enable_vpn': False,
    'enable_fip_topology_check': False,

    # Neutron can be configured with a default Subnet Pool to be used for IPv4
    # subnet-allocation. Specify the label you wish to display in the Address
    # pool selector on the create subnet step if you want to use this feature.
    'default_ipv4_subnet_pool_label': None,

    # Neutron can be configured with a default Subnet Pool to be used for IPv6
    # subnet-allocation. Specify the label you wish to display in the Address
    # pool selector on the create subnet step if you want to use this feature.
    # You must set this to enable IPv6 Prefix Delegation in a PD-capable
    # environment.
    'default_ipv6_subnet_pool_label': None,

    # The profile_support option is used to detect if an external router can be
    # configured via the dashboard. When using specific plugins the
    # profile_support can be turned on if needed.
    'profile_support': None,
    #'profile_support': 'cisco',

    # Set which provider network types are supported. Only the network types
    # in this list will be available to choose from when creating a network.
    # Network types include local, flat, vlan, gre, and vxlan.
    'supported_provider_types': ['*'],

    # Set which VNIC types are supported for port binding. Only the VNIC
    # types in this list will be available to choose from when creating a
    # port.
    # VNIC types include 'normal', 'macvtap' and 'direct'.
    # Set to empty list or None to disable VNIC type selection.
    'supported_vnic_types': ['*'],
}

# The OPENSTACK_HEAT_STACK settings can be used to disable password
# field required while launching the stack.
OPENSTACK_HEAT_STACK = {
    'enable_user_pass': True,
}

# The OPENSTACK_IMAGE_BACKEND settings can be used to customize features
# in the OpenStack Dashboard related to the Image service, such as the list
# of supported image formats.
#OPENSTACK_IMAGE_BACKEND = {
#    'image_formats': [
#        ('', _('Select format')),
#        ('aki', _('AKI - Amazon Kernel Image')),
#        ('ami', _('AMI - Amazon Machine Image')),
#        ('ari', _('ARI - Amazon Ramdisk Image')),
#        ('docker', _('Docker')),
#        ('iso', _('ISO - Optical Disk Image')),
#        ('ova', _('OVA - Open Virtual Appliance')),
#        ('qcow2', _('QCOW2 - QEMU Emulator')),
#        ('raw', _('Raw')),
#        ('vdi', _('VDI - Virtual Disk Image')),
#        ('vhd', _('VHD - Virtual Hard Disk')),
#        ('vmdk', _('VMDK - Virtual Machine Disk')),
#    ],
#}

# The IMAGE_CUSTOM_PROPERTY_TITLES settings is used to customize the titles for
# image custom property attributes that appear on image detail pages.
IMAGE_CUSTOM_PROPERTY_TITLES = {
    "architecture": _("Architecture"),
    "kernel_id": _("Kernel ID"),
    "ramdisk_id": _("Ramdisk ID"),
    "image_state": _("Euca2ools state"),
    "project_id": _("Project ID"),
    "image_type": _("Image Type"),
}

# The IMAGE_RESERVED_CUSTOM_PROPERTIES setting is used to specify which image
# custom properties should not be displayed in the Image Custom Properties
# table.
IMAGE_RESERVED_CUSTOM_PROPERTIES = []

# OPENSTACK_ENDPOINT_TYPE specifies the endpoint type to use for the endpoints
# in the Keystone service catalog. Use this setting when Horizon is running
# external to the OpenStack environment. The default is 'publicURL'.
#OPENSTACK_ENDPOINT_TYPE = "publicURL"

# SECONDARY_ENDPOINT_TYPE specifies the fallback endpoint type to use in the
# case that OPENSTACK_ENDPOINT_TYPE is not present in the endpoints
# in the Keystone service catalog. Use this setting when Horizon is running
# external to the OpenStack environment. The default is None.  This
# value should differ from OPENSTACK_ENDPOINT_TYPE if used.
#SECONDARY_ENDPOINT_TYPE = "publicURL"

# The number of objects (Swift containers/objects or images) to display
# on a single page before providing a paging element (a "more" link)
# to paginate results.
API_RESULT_LIMIT = 1000
API_RESULT_PAGE_SIZE = 20

# The size of chunk in bytes for downloading objects from Swift
SWIFT_FILE_TRANSFER_CHUNK_SIZE = 512 * 1024

# Specify a maximum number of items to display in a dropdown.
DROPDOWN_MAX_ITEMS = 30

# The timezone of the server. This should correspond with the timezone
# of your entire OpenStack installation, and hopefully be in UTC.
TIME_ZONE = "Asia/Shanghai"

# When launching an instance, the menu of available flavors is
# sorted by RAM usage, ascending. If you would like a different sort order,
# you can provide another flavor attribute as sorting key. Alternatively, you
# can provide a custom callback method to use for sorting. You can also provide
# a flag for reverse sort. For more info, see
# http://docs.python.org/2/library/functions.html#sorted
#CREATE_INSTANCE_FLAVOR_SORT = {
#    'key': 'name',
#     # or
#    'key': my_awesome_callback_method,
#    'reverse': False,
#}

# Set this to True to display an 'Admin Password' field on the Change Password
# form to verify that it is indeed the admin logged-in who wants to change
# the password.
#ENFORCE_PASSWORD_CHECK = False

# Modules that provide /auth routes that can be used to handle different types
# of user authentication. Add auth plugins that require extra route handling to
# this list.
#AUTHENTICATION_URLS = [
#    'openstack_auth.urls',
#]

# The Horizon Policy Enforcement engine uses these values to load per service
# policy rule files. The content of these files should match the files the
# OpenStack services are using to determine role based access control in the
# target installation.

# Path to directory containing policy.json files
POLICY_FILES_PATH = '/etc/openstack-dashboard'

# Map of local copy of service policy files.
# Please insure that your identity policy file matches the one being used on
# your keystone servers. There is an alternate policy file that may be used
# in the Keystone v3 multi-domain case, policy.v3cloudsample.json.
# This file is not included in the Horizon repository by default but can be
# found at
# http://git.openstack.org/cgit/openstack/keystone/tree/etc/ \
# policy.v3cloudsample.json
# Having matching policy files on the Horizon and Keystone servers is essential
# for normal operation. This holds true for all services and their policy files.
#POLICY_FILES = {
#    'identity': 'keystone_policy.json',
#    'compute': 'nova_policy.json',
#    'volume': 'cinder_policy.json',
#    'image': 'glance_policy.json',
#    'orchestration': 'heat_policy.json',
#    'network': 'neutron_policy.json',
#    'telemetry': 'ceilometer_policy.json',
#}

# TODO: (david-lyle) remove when plugins support adding settings.
# Note: Only used when trove-dashboard plugin is configured to be used by
# Horizon.
# Trove user and database extension support. By default support for
# creating users and databases on database instances is turned on.
# To disable these extensions set the permission here to something
# unusable such as ["!"].
#TROVE_ADD_USER_PERMS = []
#TROVE_ADD_DATABASE_PERMS = []

# Change this patch to the appropriate list of tuples containing
# a key, label and static directory containing two files:
# _variables.scss and _styles.scss
#AVAILABLE_THEMES = [
#    ('default', 'Default', 'themes/default'),
#    ('material', 'Material', 'themes/material'),
#]

LOGGING = {
    'version': 1,
    # When set to True this will disable all logging except
    # for loggers specified in this configuration dictionary. Note that
    # if nothing is specified here and disable_existing_loggers is True,
    # django.db.backends will still log unless it is disabled explicitly.
    'disable_existing_loggers': False,
    'handlers': {
        'null': {
            'level': 'DEBUG',
            'class': 'logging.NullHandler',
        },
        'console': {
            # Set the level to "DEBUG" for verbose output logging.
            'level': 'INFO',
            'class': 'logging.StreamHandler',
        },
    },
    'loggers': {
        # Logging from django.db.backends is VERY verbose, send to null
        # by default.
        'django.db.backends': {
            'handlers': ['null'],
            'propagate': False,
        },
        'requests': {
            'handlers': ['null'],
            'propagate': False,
        },
        'horizon': {
            'handlers': ['console'],
            'level': 'DEBUG',
            'propagate': False,
        },
        'openstack_dashboard': {
            'handlers': ['console'],
            'level': 'DEBUG',
            'propagate': False,
        },
        'novaclient': {
            'handlers': ['console'],
            'level': 'DEBUG',
            'propagate': False,
        },
        'cinderclient': {
            'handlers': ['console'],
            'level': 'DEBUG',
            'propagate': False,
        },
        'keystoneclient': {
            'handlers': ['console'],
            'level': 'DEBUG',
            'propagate': False,
        },
        'glanceclient': {
            'handlers': ['console'],
            'level': 'DEBUG',
            'propagate': False,
        },
        'neutronclient': {
            'handlers': ['console'],
            'level': 'DEBUG',
            'propagate': False,
        },
        'heatclient': {
            'handlers': ['console'],
            'level': 'DEBUG',
            'propagate': False,
        },
        'ceilometerclient': {
            'handlers': ['console'],
            'level': 'DEBUG',
            'propagate': False,
        },
        'swiftclient': {
            'handlers': ['console'],
            'level': 'DEBUG',
            'propagate': False,
        },
        'openstack_auth': {
            'handlers': ['console'],
            'level': 'DEBUG',
            'propagate': False,
        },
        'nose.plugins.manager': {
            'handlers': ['console'],
            'level': 'DEBUG',
            'propagate': False,
        },
        'django': {
            'handlers': ['console'],
            'level': 'DEBUG',
            'propagate': False,
        },
        'iso8601': {
            'handlers': ['null'],
            'propagate': False,
        },
        'scss': {
            'handlers': ['null'],
            'propagate': False,
        },
    },
}

# 'direction' should not be specified for all_tcp/udp/icmp.
# It is specified in the form.
SECURITY_GROUP_RULES = {
    'all_tcp': {
        'name': _('All TCP'),
        'ip_protocol': 'tcp',
        'from_port': '1',
        'to_port': '65535',
    },
    'all_udp': {
        'name': _('All UDP'),
        'ip_protocol': 'udp',
        'from_port': '1',
        'to_port': '65535',
    },
    'all_icmp': {
        'name': _('All ICMP'),
        'ip_protocol': 'icmp',
        'from_port': '-1',
        'to_port': '-1',
    },
    'ssh': {
        'name': 'SSH',
        'ip_protocol': 'tcp',
        'from_port': '22',
        'to_port': '22',
    },
    'smtp': {
        'name': 'SMTP',
        'ip_protocol': 'tcp',
        'from_port': '25',
        'to_port': '25',
    },
    'dns': {
        'name': 'DNS',
        'ip_protocol': 'tcp',
        'from_port': '53',
        'to_port': '53',
    },
    'http': {
        'name': 'HTTP',
        'ip_protocol': 'tcp',
        'from_port': '80',
        'to_port': '80',
    },
    'pop3': {
        'name': 'POP3',
        'ip_protocol': 'tcp',
        'from_port': '110',
        'to_port': '110',
    },
    'imap': {
        'name': 'IMAP',
        'ip_protocol': 'tcp',
        'from_port': '143',
        'to_port': '143',
    },
    'ldap': {
        'name': 'LDAP',
        'ip_protocol': 'tcp',
        'from_port': '389',
        'to_port': '389',
    },
    'https': {
        'name': 'HTTPS',
        'ip_protocol': 'tcp',
        'from_port': '443',
        'to_port': '443',
    },
    'smtps': {
        'name': 'SMTPS',
        'ip_protocol': 'tcp',
        'from_port': '465',
        'to_port': '465',
    },
    'imaps': {
        'name': 'IMAPS',
        'ip_protocol': 'tcp',
        'from_port': '993',
        'to_port': '993',
    },
    'pop3s': {
        'name': 'POP3S',
        'ip_protocol': 'tcp',
        'from_port': '995',
        'to_port': '995',
    },
    'ms_sql': {
        'name': 'MS SQL',
        'ip_protocol': 'tcp',
        'from_port': '1433',
        'to_port': '1433',
    },
    'mysql': {
        'name': 'MYSQL',
        'ip_protocol': 'tcp',
        'from_port': '3306',
        'to_port': '3306',
    },
    'rdp': {
        'name': 'RDP',
        'ip_protocol': 'tcp',
        'from_port': '3389',
        'to_port': '3389',
    },
}

# Deprecation Notice:
#
# The setting FLAVOR_EXTRA_KEYS has been deprecated.
# Please load extra spec metadata into the Glance Metadata Definition Catalog.
#
# The sample quota definitions can be found in:
# <glance_source>/etc/metadefs/compute-quota.json
#
# The metadata definition catalog supports CLI and API:
#  $glance --os-image-api-version 2 help md-namespace-import
#  $glance-manage db_load_metadefs <directory_with_definition_files>
#
# See Metadata Definitions on: http://docs.openstack.org/developer/glance/

# TODO: (david-lyle) remove when plugins support settings natively
# Note: This is only used when the Sahara plugin is configured and enabled
# for use in Horizon.
# Indicate to the Sahara data processing service whether or not
# automatic floating IP allocation is in effect.  If it is not
# in effect, the user will be prompted to choose a floating IP
# pool for use in their cluster.  False by default.  You would want
# to set this to True if you were running Nova Networking with
# auto_assign_floating_ip = True.
#SAHARA_AUTO_IP_ALLOCATION_ENABLED = False

# The hash algorithm to use for authentication tokens. This must
# match the hash algorithm that the identity server and the
# auth_token middleware are using. Allowed values are the
# algorithms supported by Python's hashlib library.
#OPENSTACK_TOKEN_HASH_ALGORITHM = 'md5'

# Hashing tokens from Keystone keeps the Horizon session data smaller, but it
# doesn't work in some cases when using PKI tokens.  Uncomment this value and
# set it to False if using PKI tokens and there are 401 errors due to token
# hashing.
#OPENSTACK_TOKEN_HASH_ENABLED = True

# AngularJS requires some settings to be made available to
# the client side. Some settings are required by in-tree / built-in horizon
# features. These settings must be added to REST_API_REQUIRED_SETTINGS in the
# form of ['SETTING_1','SETTING_2'], etc.
#
# You may remove settings from this list for security purposes, but do so at
# the risk of breaking a built-in horizon feature. These settings are required
# for horizon to function properly. Only remove them if you know what you
# are doing. These settings may in the future be moved to be defined within
# the enabled panel configuration.
# You should not add settings to this list for out of tree extensions.
# See: https://wiki.openstack.org/wiki/Horizon/RESTAPI
REST_API_REQUIRED_SETTINGS = ['OPENSTACK_HYPERVISOR_FEATURES',
                              'LAUNCH_INSTANCE_DEFAULTS']

# Additional settings can be made available to the client side for
# extensibility by specifying them in REST_API_ADDITIONAL_SETTINGS
# !! Please use extreme caution as the settings are transferred via HTTP/S
# and are not encrypted on the browser. This is an experimental API and
# may be deprecated in the future without notice.
#REST_API_ADDITIONAL_SETTINGS = []

# DISALLOW_IFRAME_EMBED can be used to prevent Horizon from being embedded
# within an iframe. Legacy browsers are still vulnerable to a Cross-Frame
# Scripting (XFS) vulnerability, so this option allows extra security hardening
# where iframes are not used in deployment. Default setting is True.
# For more information see:
# http://tinyurl.com/anticlickjack
#DISALLOW_IFRAME_EMBED = True
7.3 验证操作
7.3.1 修改配置文件,否则后续访问dashboard会报500错误
sed -i.bak  '3aWSGIApplicationGroup %{GLOBAL}' \
/etc/httpd/conf.d/openstack-dashboard.conf

#重启httpd
systemctl enable httpd && systemctl restart httpd
7.3.2 登录dashboard
10.0.0.31/dashboard
域:default
用户名:admin
密码:ADMIN_PASS

登陆后首界面

到此,计算节点Dashboard安装完成!!!
如果遇到如下错误
解决方法
安装dashboard节点做以下操作
1.修改配置文件/etc/openstack-dashboard/local_settings
修改		SESSION_ENGINE = 'django.contrib.sessions.backends.cache'
修改为	 SESSION_ENGINE = 'django.contrib.sessions.backends.file'

2.重启httpd
systemctl restart httpd