spug+gitlab实现webhook
1.spug获取 Webhook URL 和 Secret Token
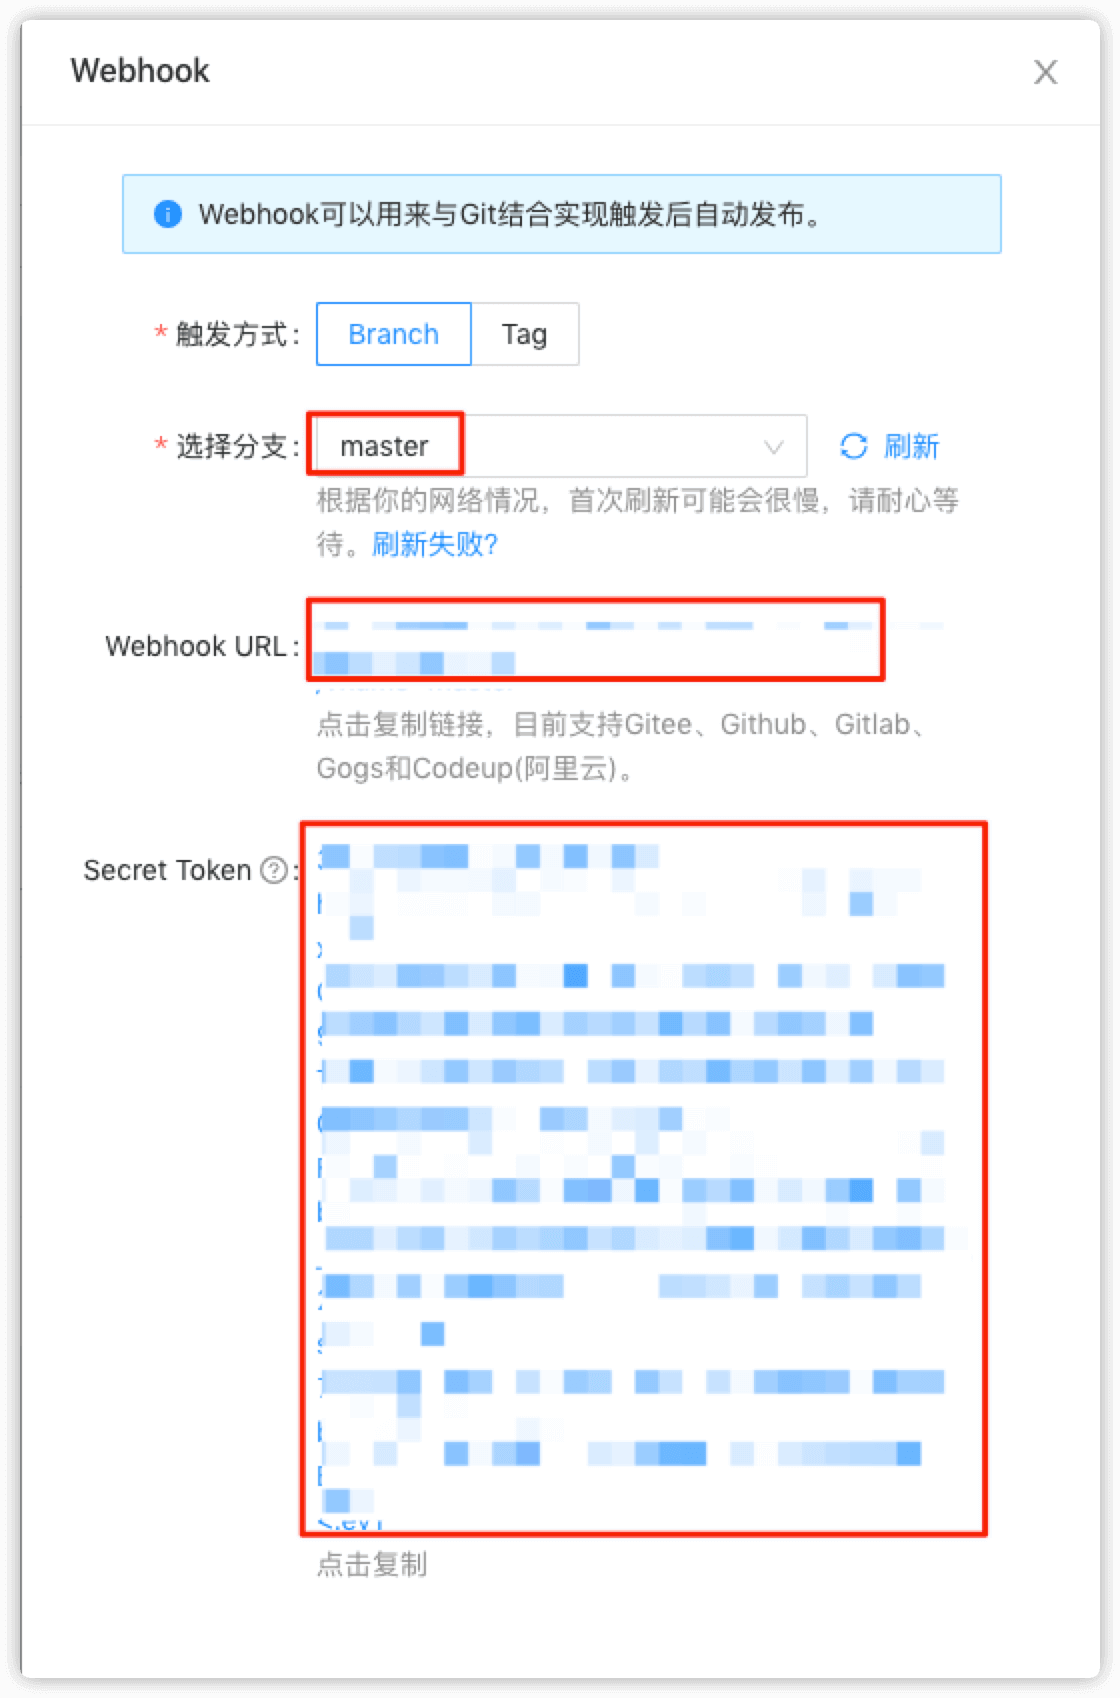
在 应用管理 下找到相应项目,然后点击 Webhook

选择分支或者tag,然后复制 webhook URL 和 Secret Token
2.gitlab配置webhook
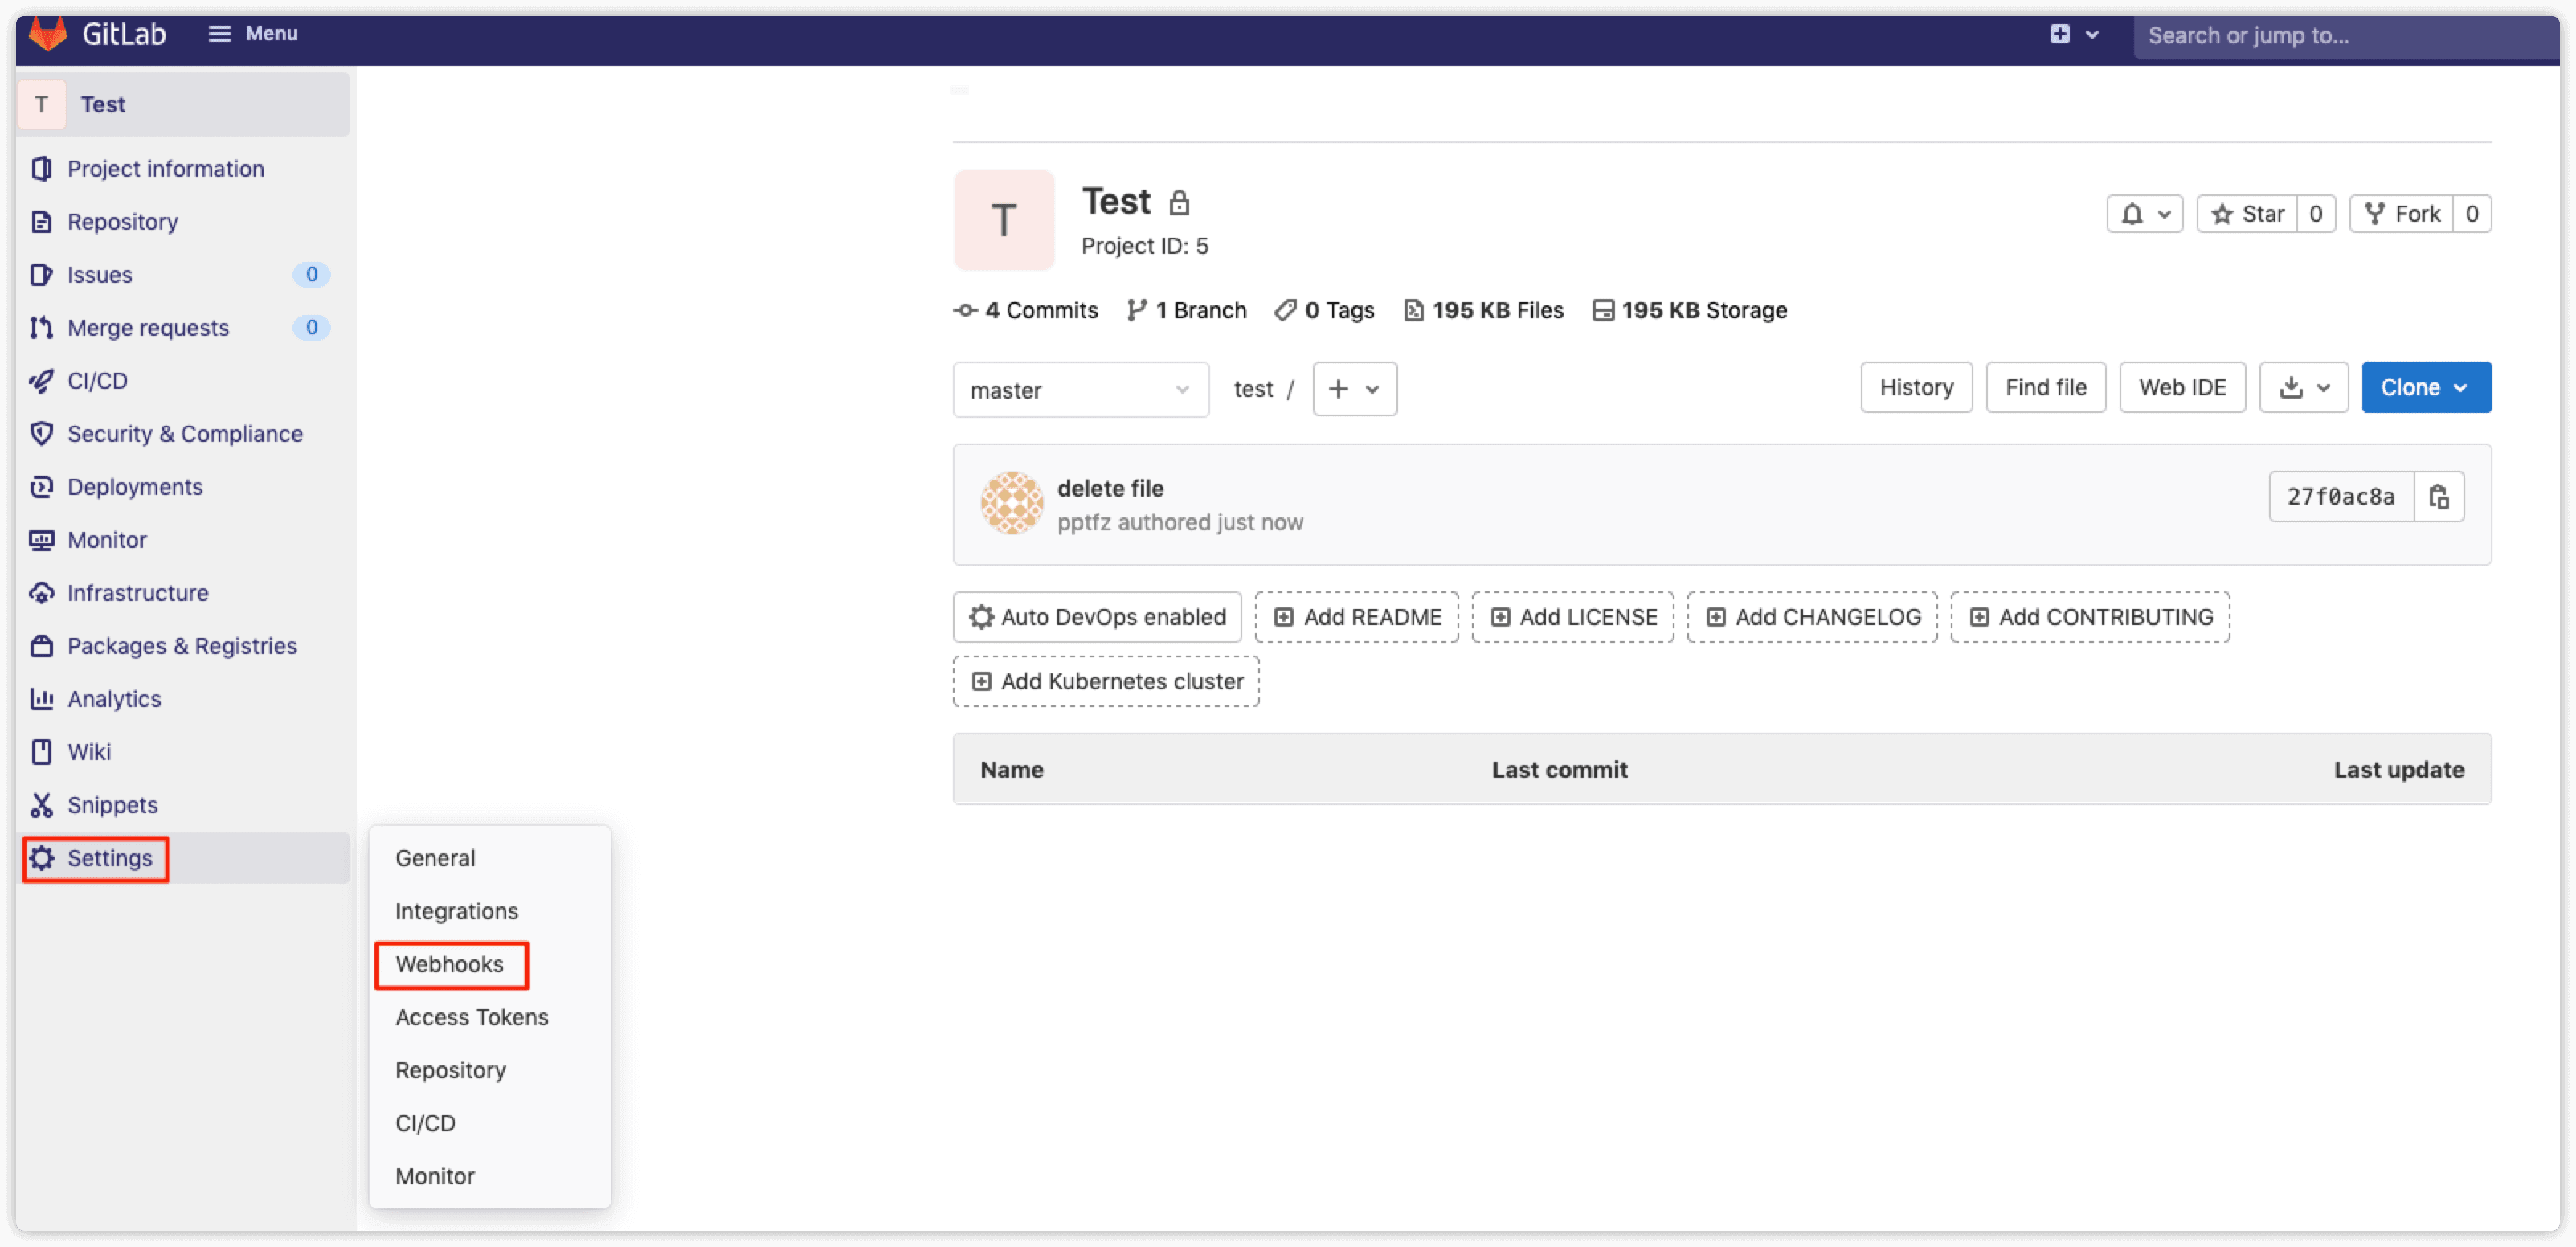
在gitlab项目下,点击 Settings -> Webhooks
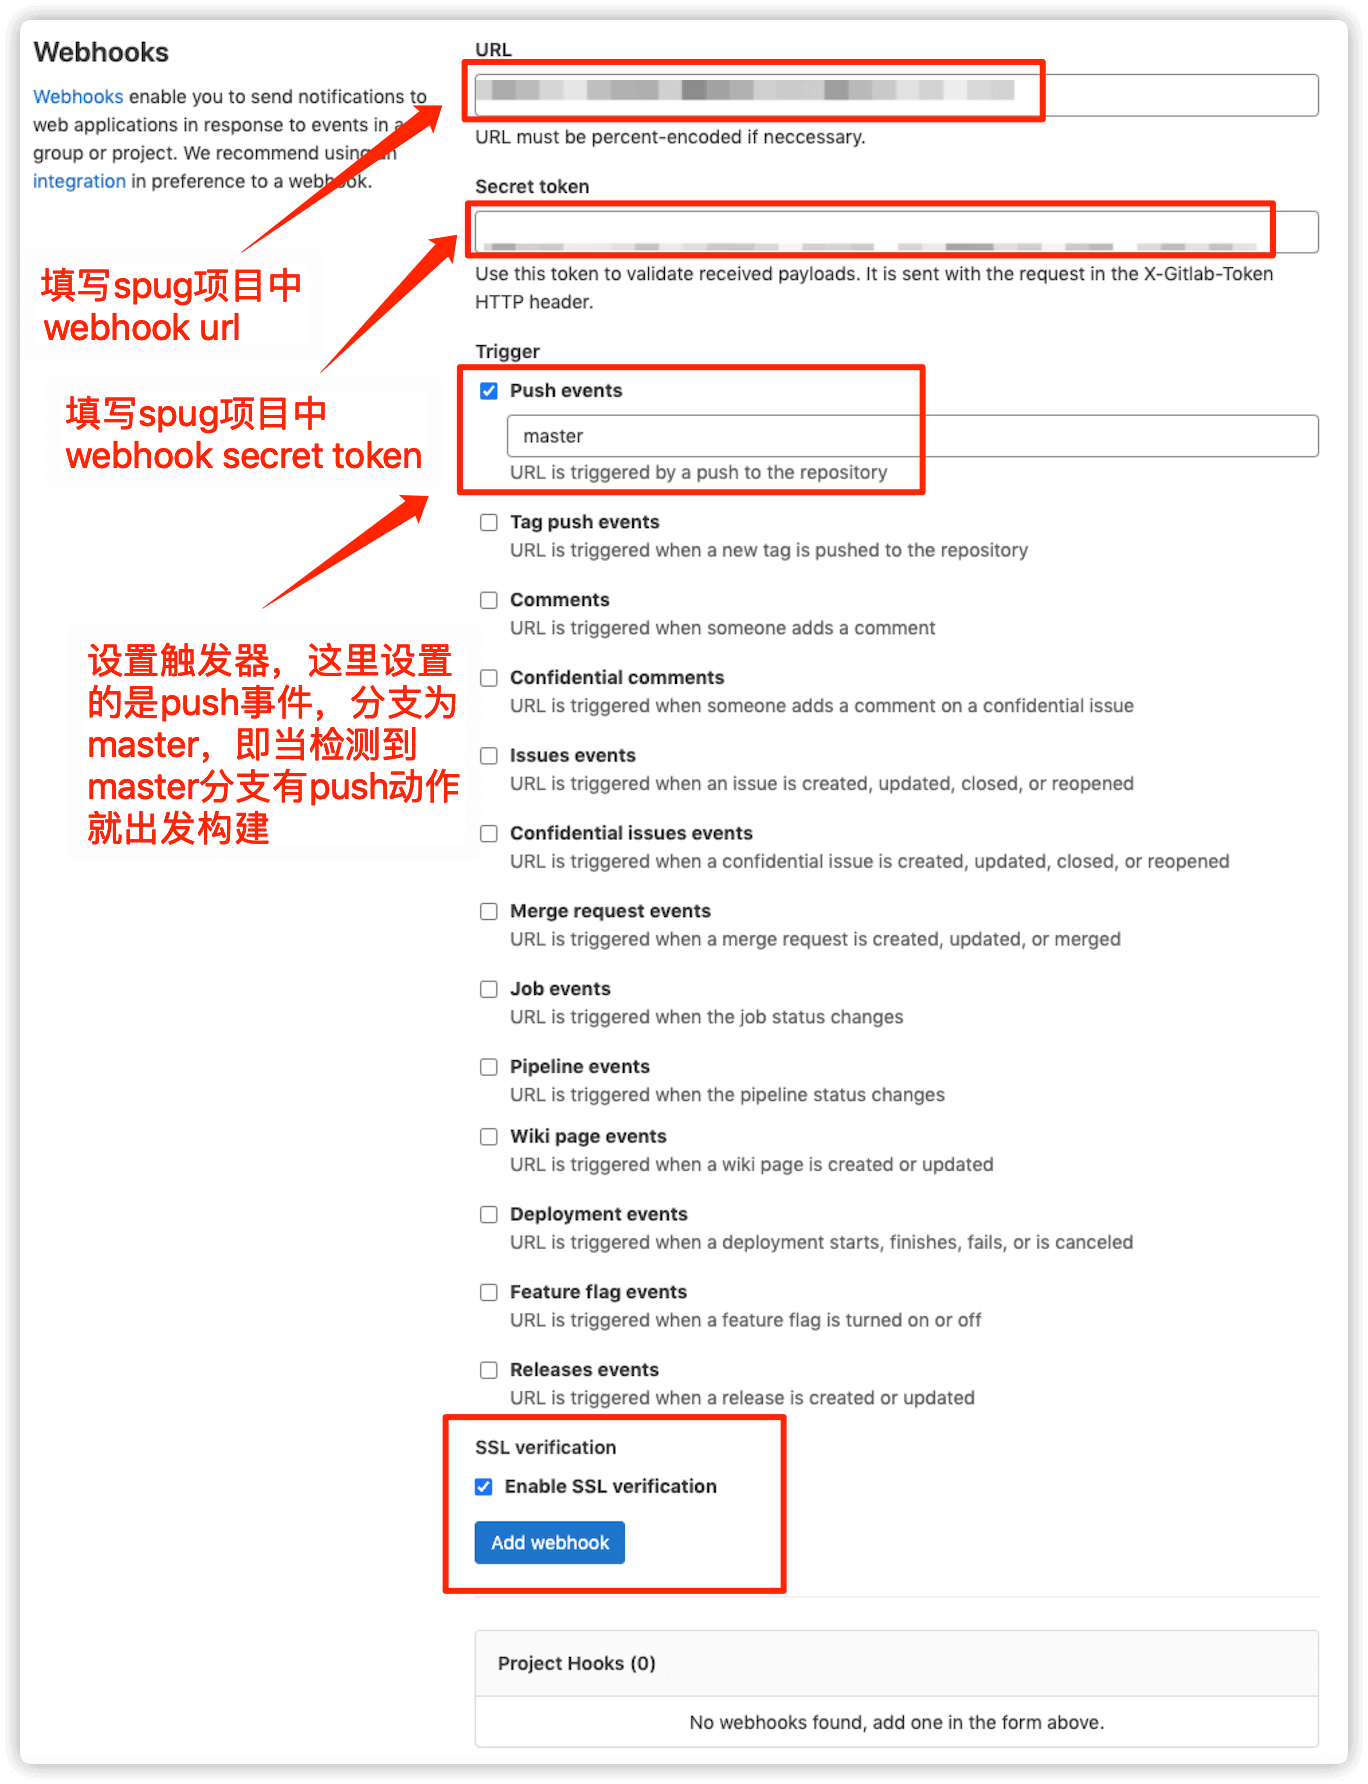
分别填写spug项目中的 webhook url 和 sceret token,设置触发条件
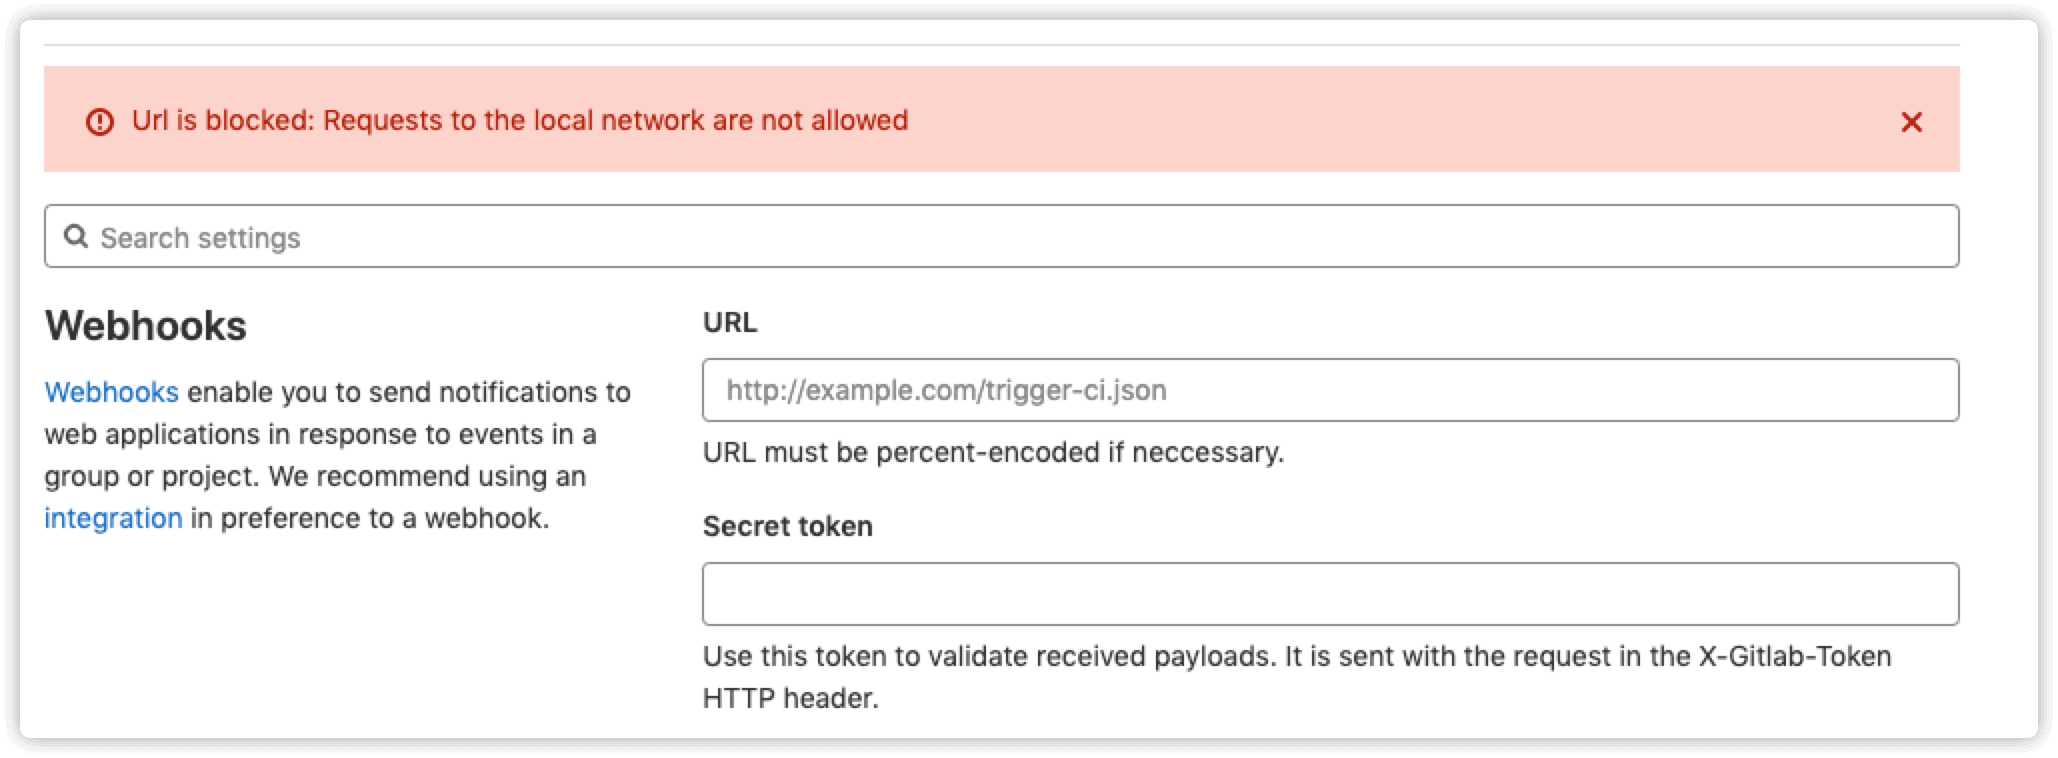
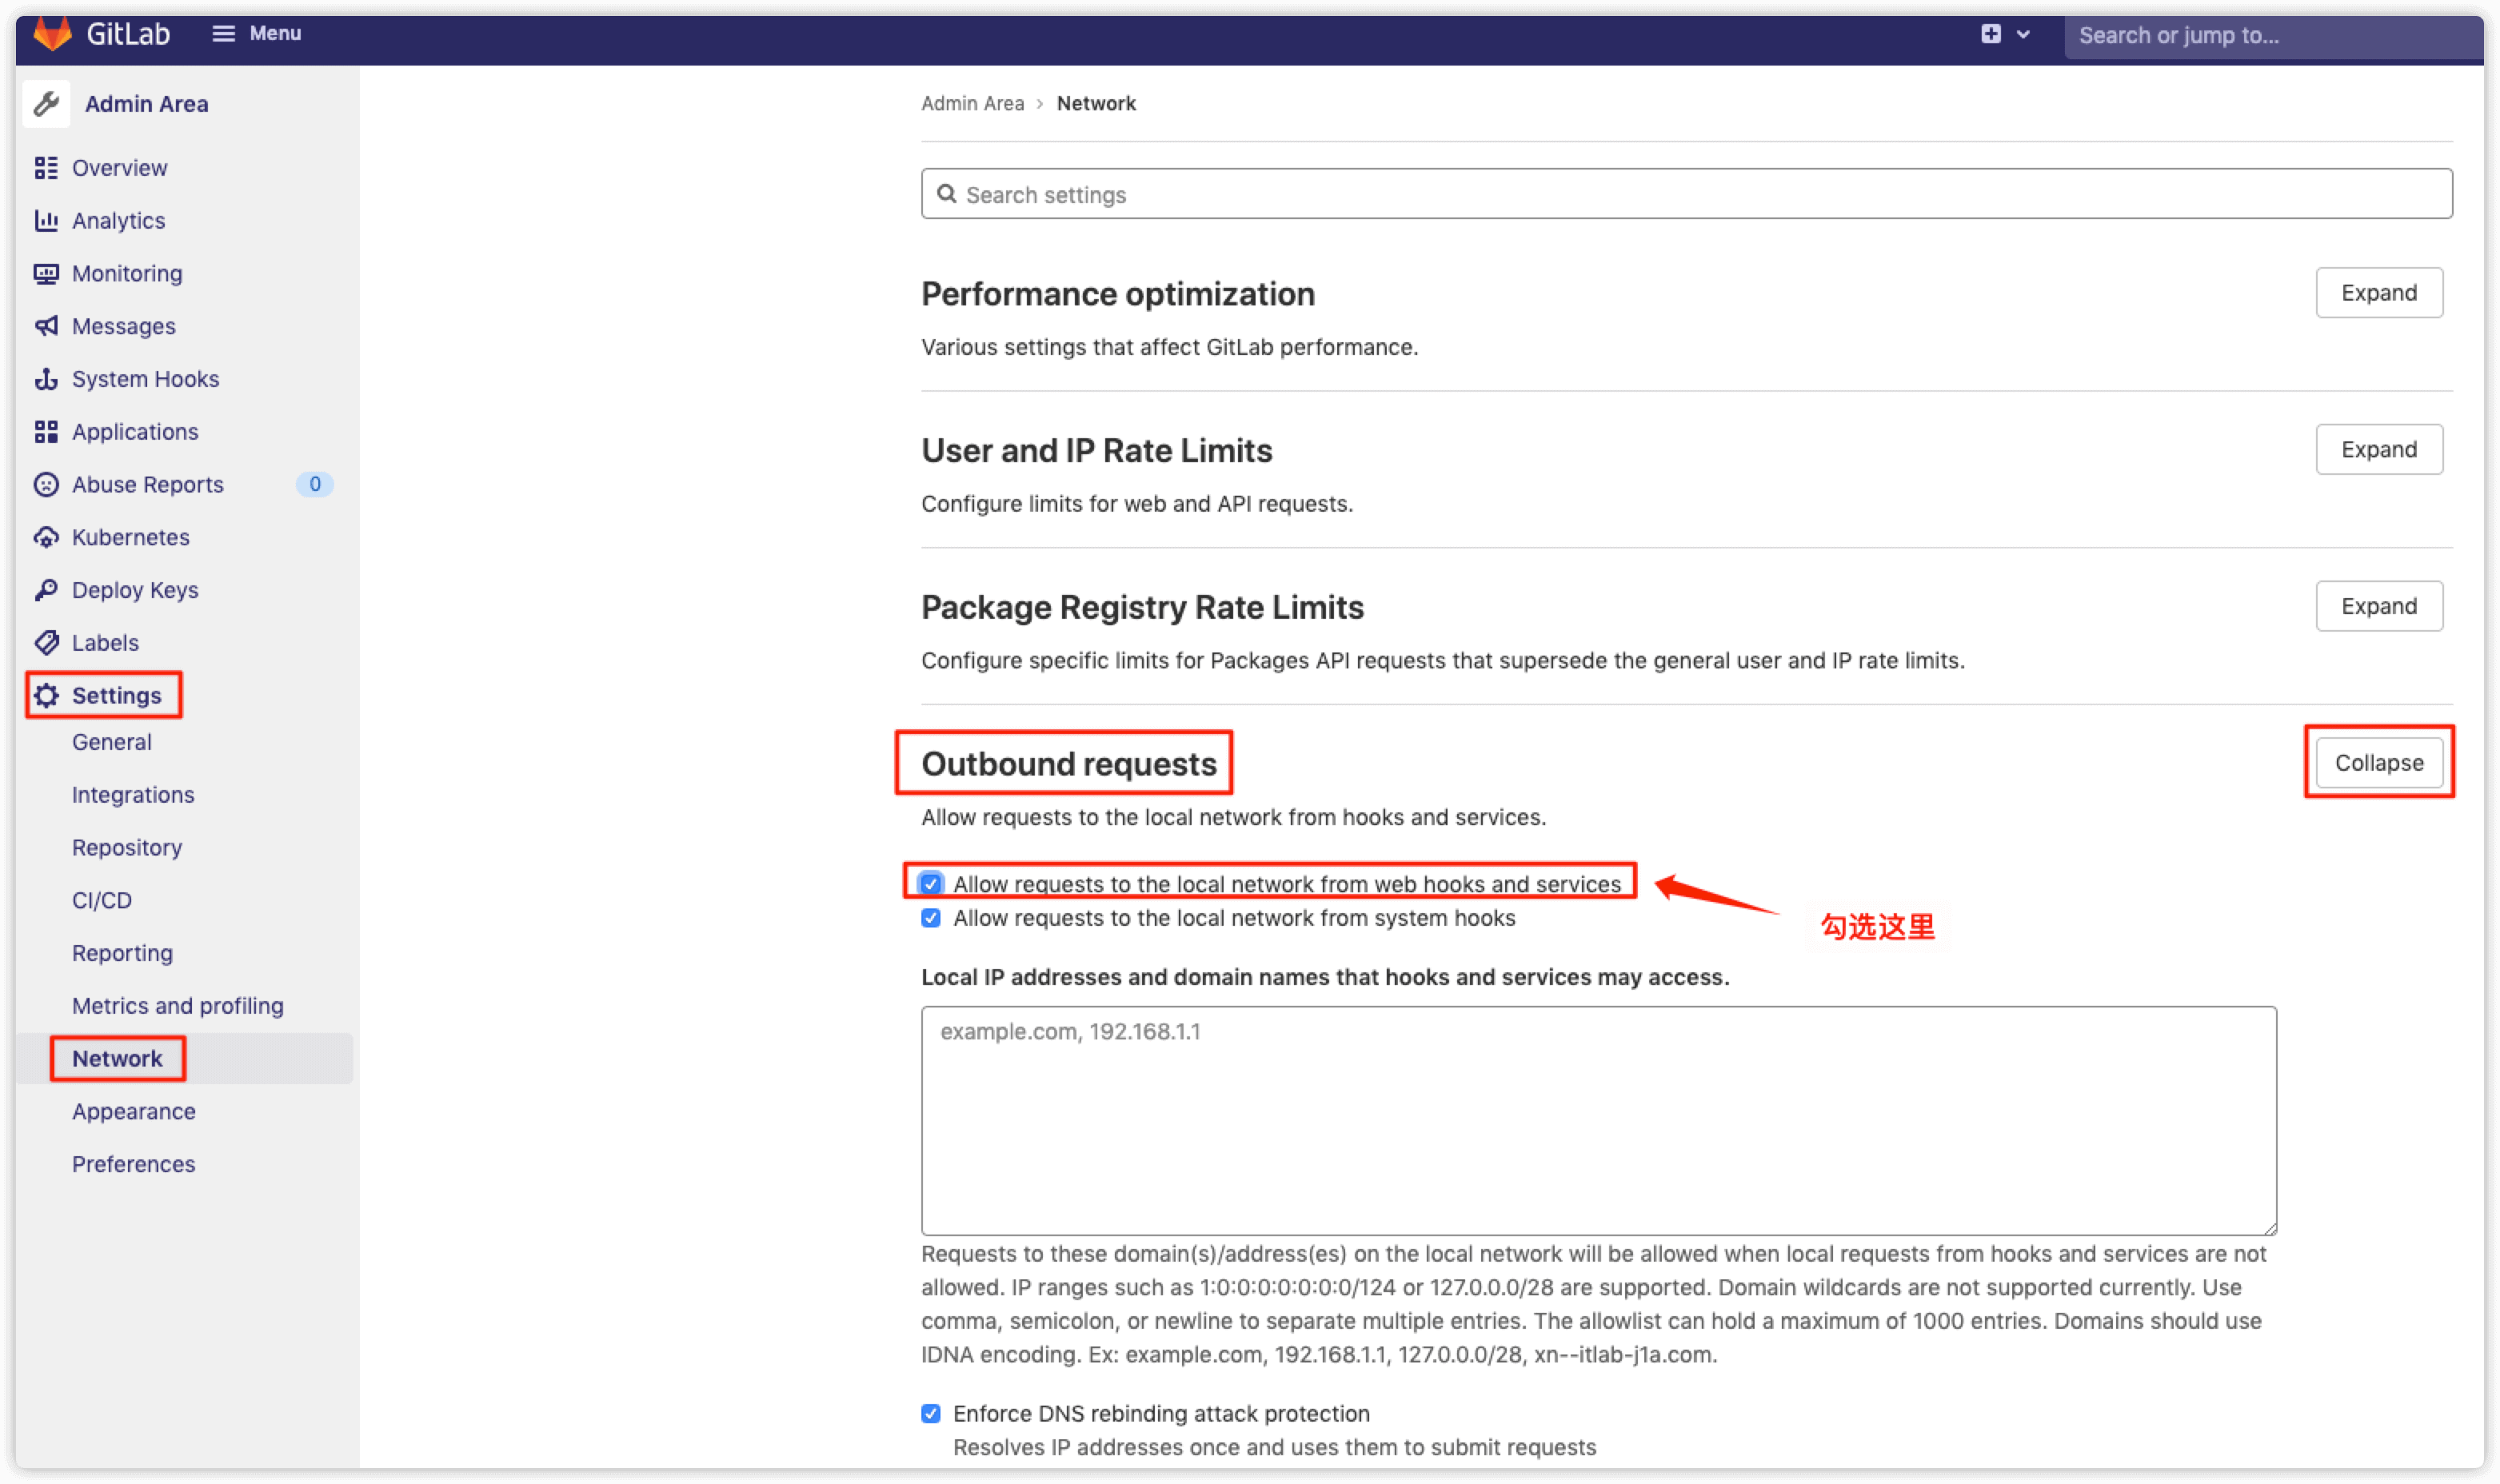
点击 Add webhook 报错 Url is blocked: Requests to the local network are not allowed
解决方法
Settings -> network -> Outbound requests -> Expand -> 勾选 Allow requests to the local network from web hooks and services
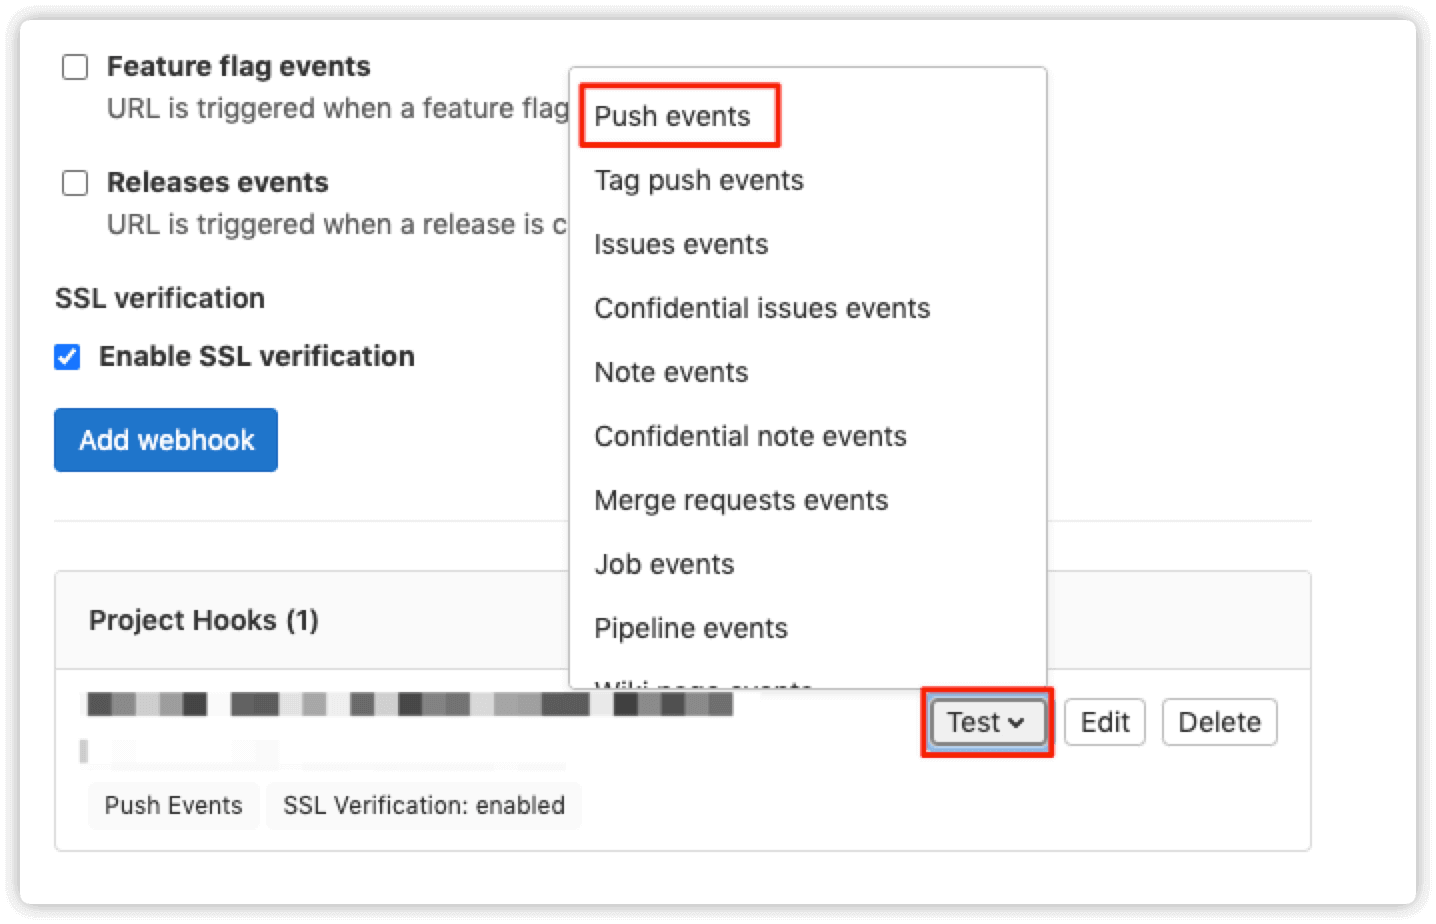
webhook配置完成后点击下方的 Test 按钮,然后点击 push events
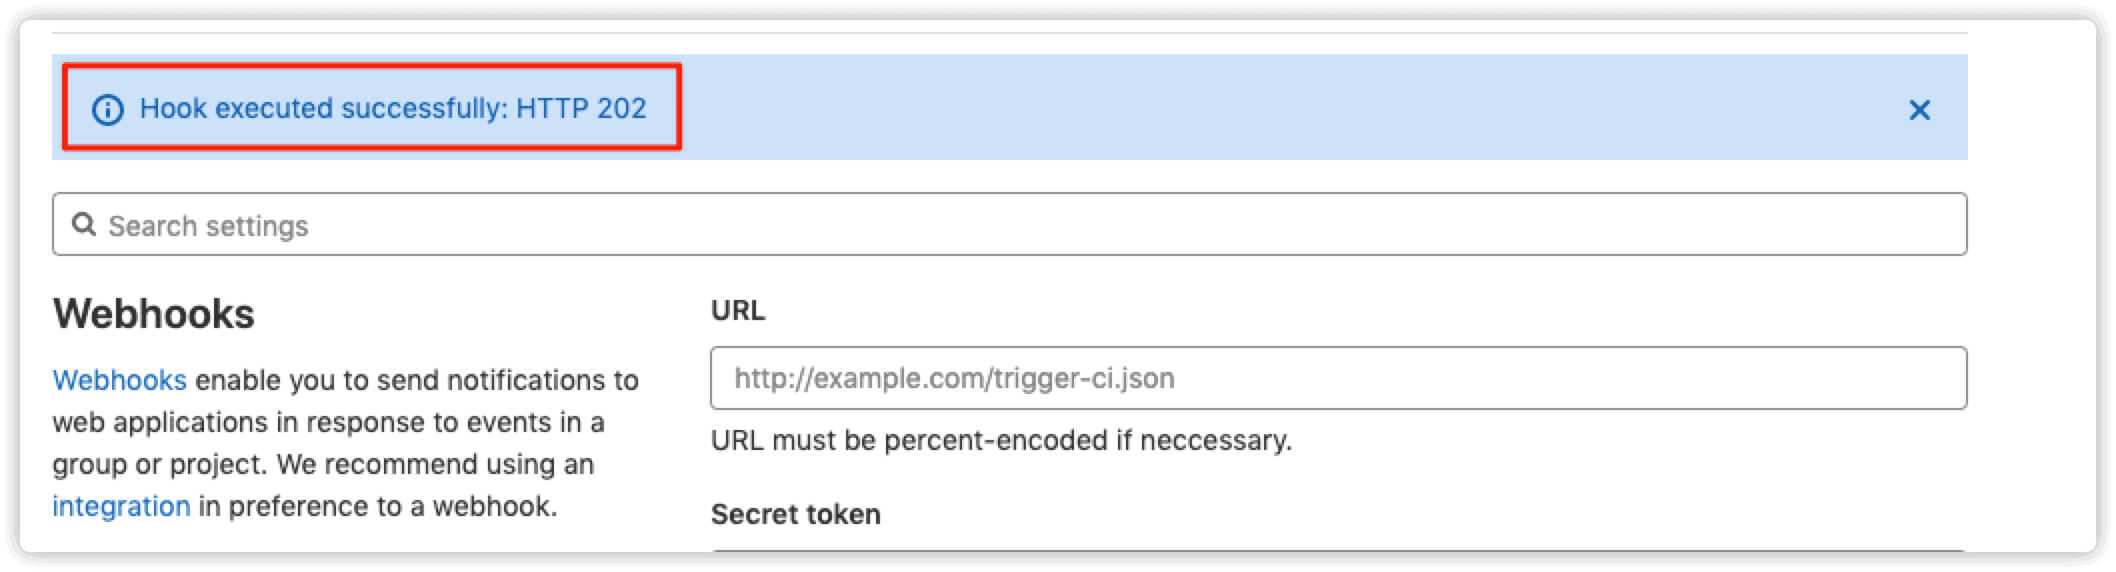
提示如下即表示成功
3.验证
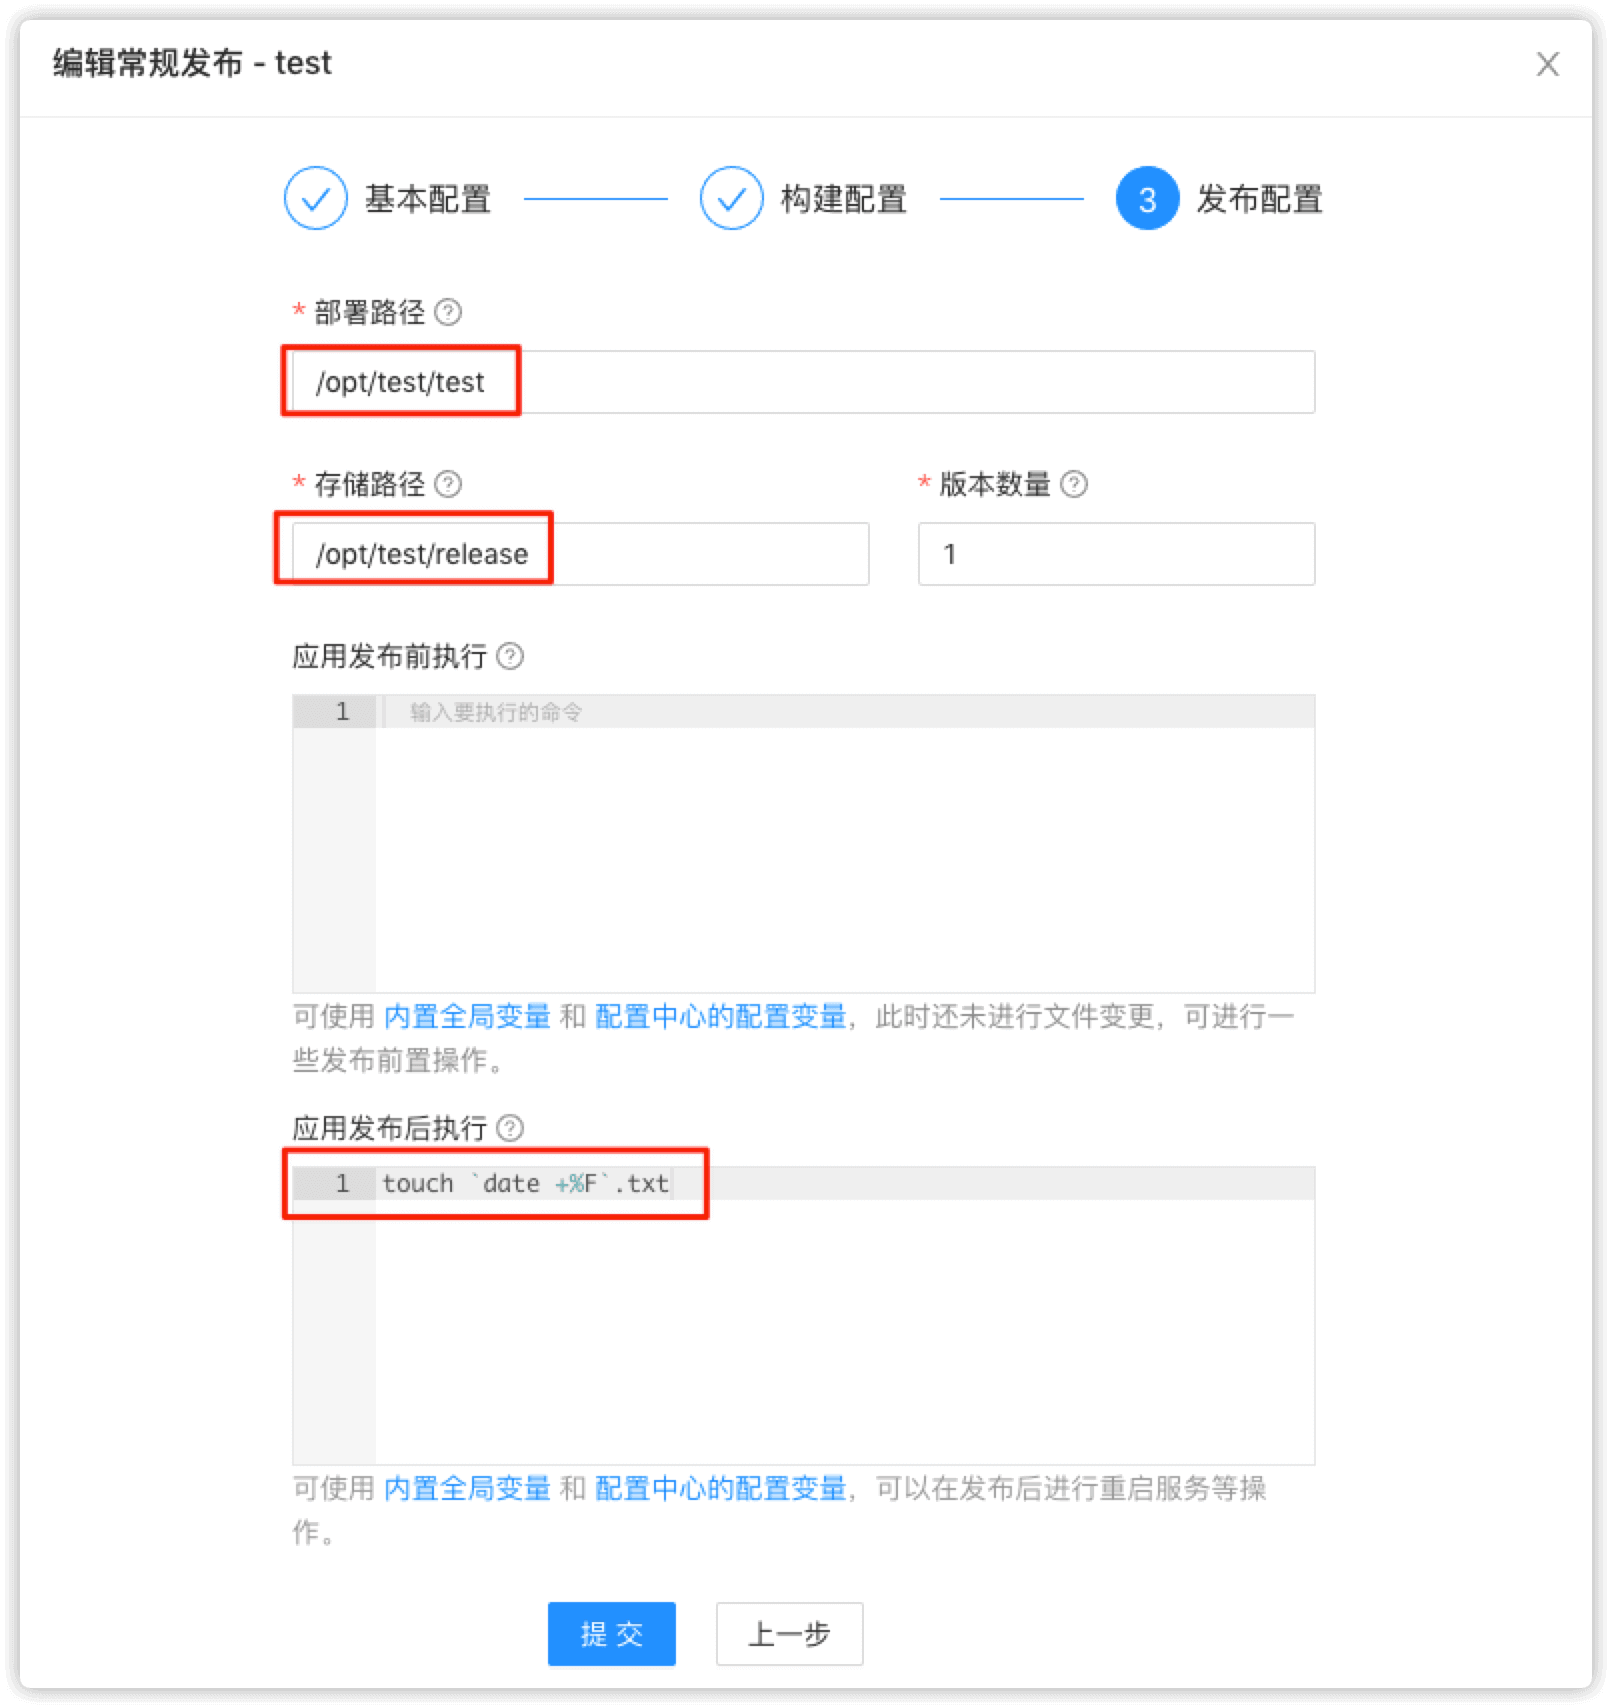
spug中项目配置如下,即本机提交代码至指定git仓库,则spug会自动触发构建,之后会在目标机器的 /opt/test/test 目录下生成一个当天日期txt文件
目标机器需要生成 /opt/test/release 目录,
/opt/test/test目录不需要生成,spug会自动生成,否则会报错
本机新建测试文件并提交至gitlab
在 构建仓库 下会看到相应的构建

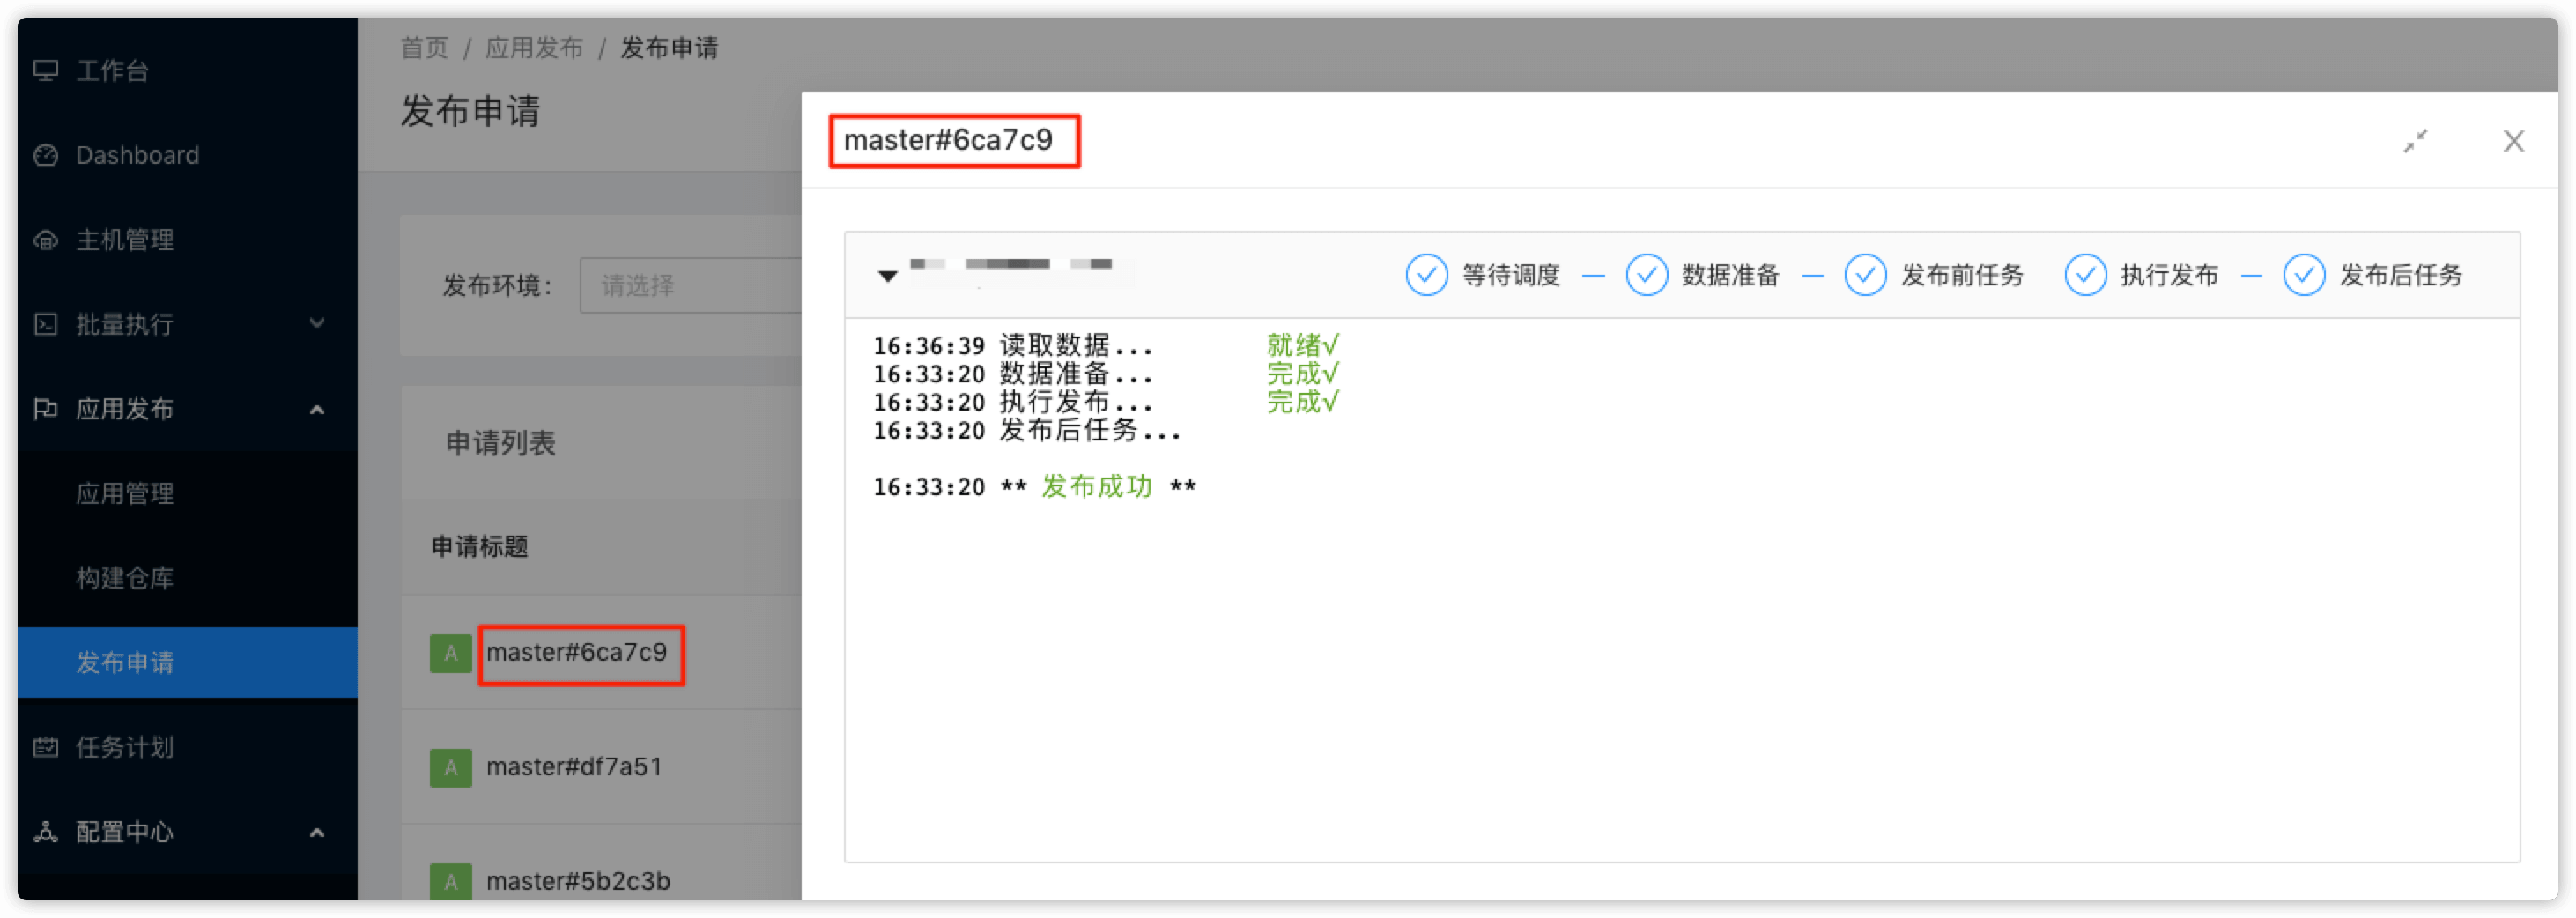
在 发布申请 下会看到之前的构建已经成功发布

在服务器的 /opt/test/test 目录下也会生成相应文件
$ ls /opt/test/test/*.txt
/opt/test/test/2021-09-09.txt